Secure Fortress Dashboard
The Jira Secure Fortress Dashboard is the unified control center for all your encrypted fields.
Accessing and Structuring the Dashboard
To access the dashboard:
- Go to the Jira Administration menu > Manage apps.
- In the left-hand sidebar, under the Secure Fortress section, click on Manage Settings.
This will take you to the main page of the add-on, which contains its own side navigation menu organized into two groups:
Configuration
- Fields: Manages the currently encrypted fields and their viewing permissions.
- Keys: Offers a key visualization panel of the encryption keys and their associated fields.
- Migration: Allows you to protect existing standard text fields or revoke the protection of encrypted fields. See Protecting Existing Fields.
System
- Logs: Displays the audit logs of all interactions.
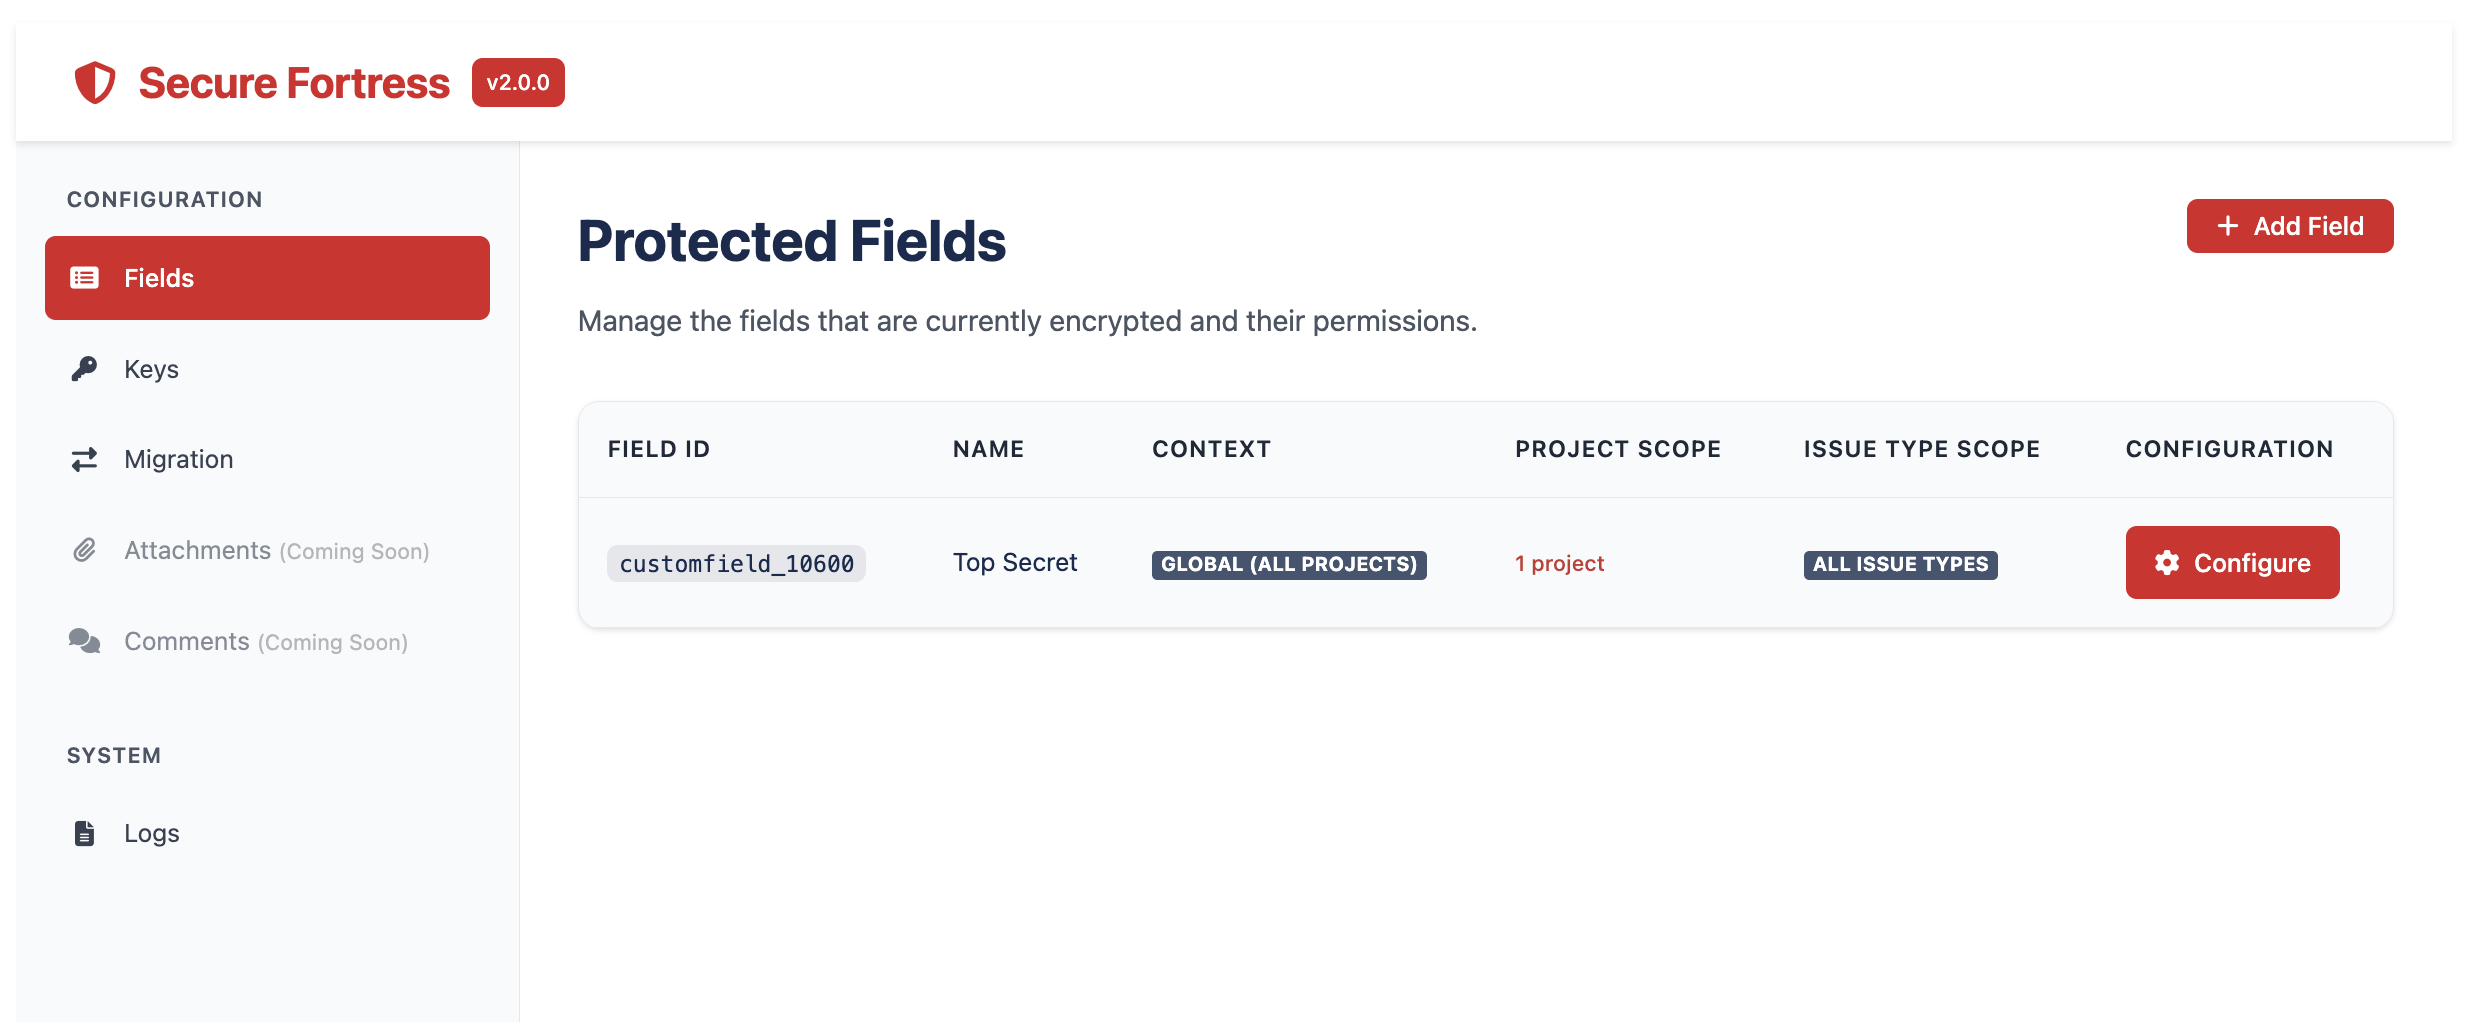
Fields Section
This is the default view when you enter the dashboard. It displays a list of all the "Encrypted Custom Fields" you have created in your Jira instance.
The table provides the following information and actions:
- Field ID: The unique identifier that Jira assigns to the field (e.g., customfield_10021).
- Name: The descriptive name of the field.
- Context: The Jira projects where the field is available.
- Configuration:
- Configure: Takes you to the field configuration page for that field, where you can define viewing permissions.
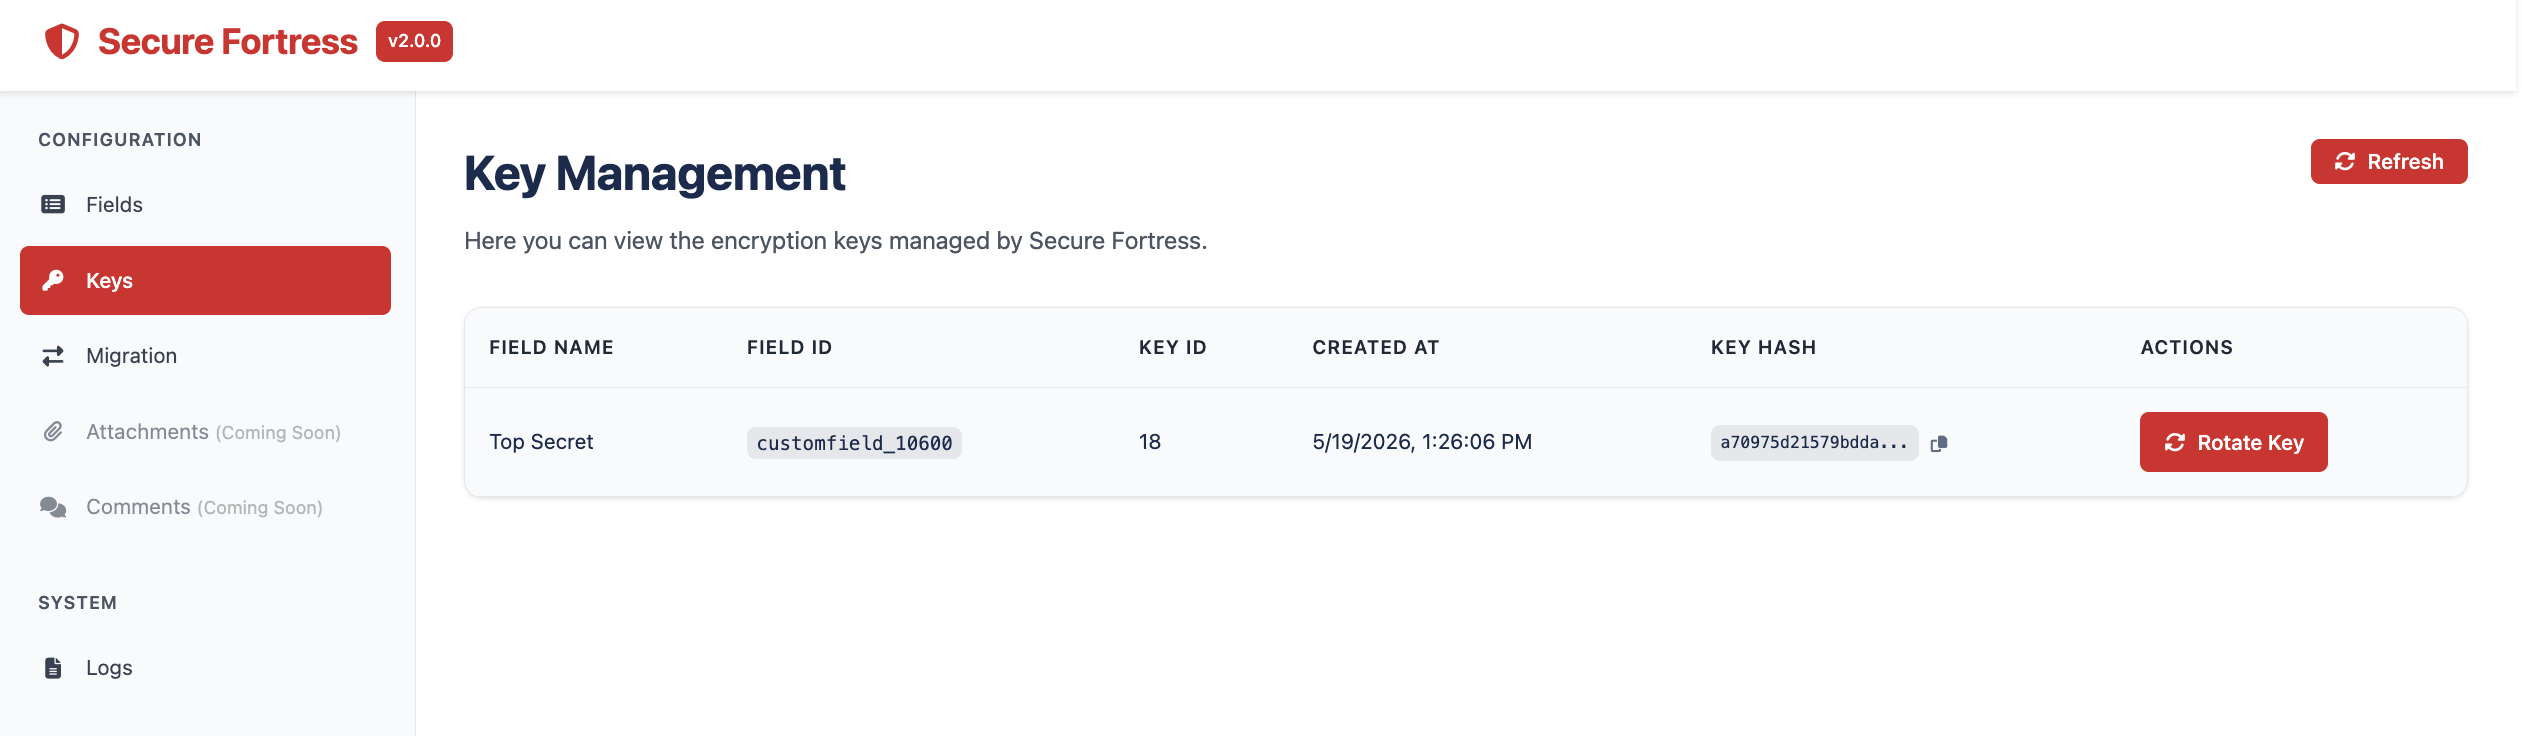
Key Visualization Panel
By selecting Keys in the dashboard's side menu, you will access a panel that provides a centralized view of all active encryption keys and their relationship with the custom fields. It is a key monitoring tool for Jira administrators.
The table displays:
- Field Name: The name of the custom field.
- Field ID: The ID of the custom field associated with that key.
- Creation Date: The date and time the key was created for the corresponding field.
- Key Hash: The encryption key generated for a field.
- Actions: Rotate key button to initiate key rotation for that field. The button is automatically disabled if a rotation is already in progress for that field.
For more information on how rotation works and how to interpret the progress panel, see Key Rotation.