Add-on Configuration
The Jira Live Chat (DC) administration panel is located at Jira Administration > Manage apps > Jira Live Chat (DC). Since version 2.0.0, you can manage each service portal's configuration independently.
Configuring multiple portals
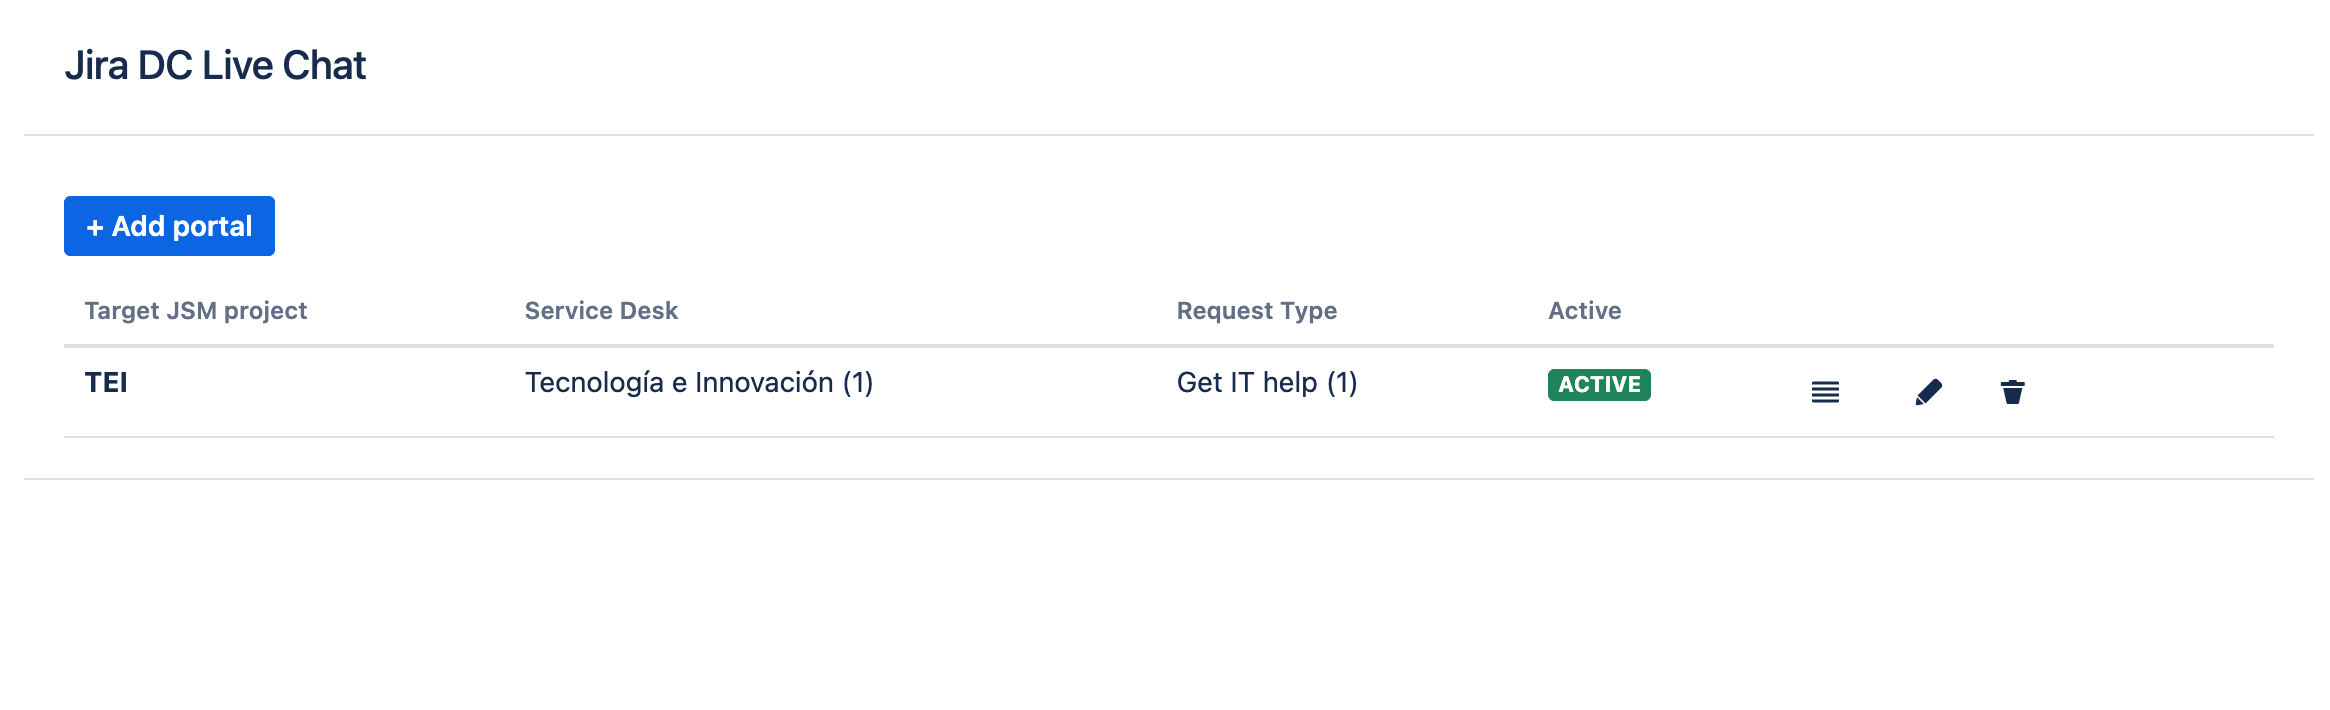
Each configuration connects a service portal to the project, Service Desk, and request type where chats will be created. The chat therefore no longer has one global destination: each customer uses the configuration for the portal where they start the conversation.
The configured portals list shows:
- The Jira Service Management project.
- The associated Service Desk.
- The request type.
- Whether the portal is Active.
Adding a portal
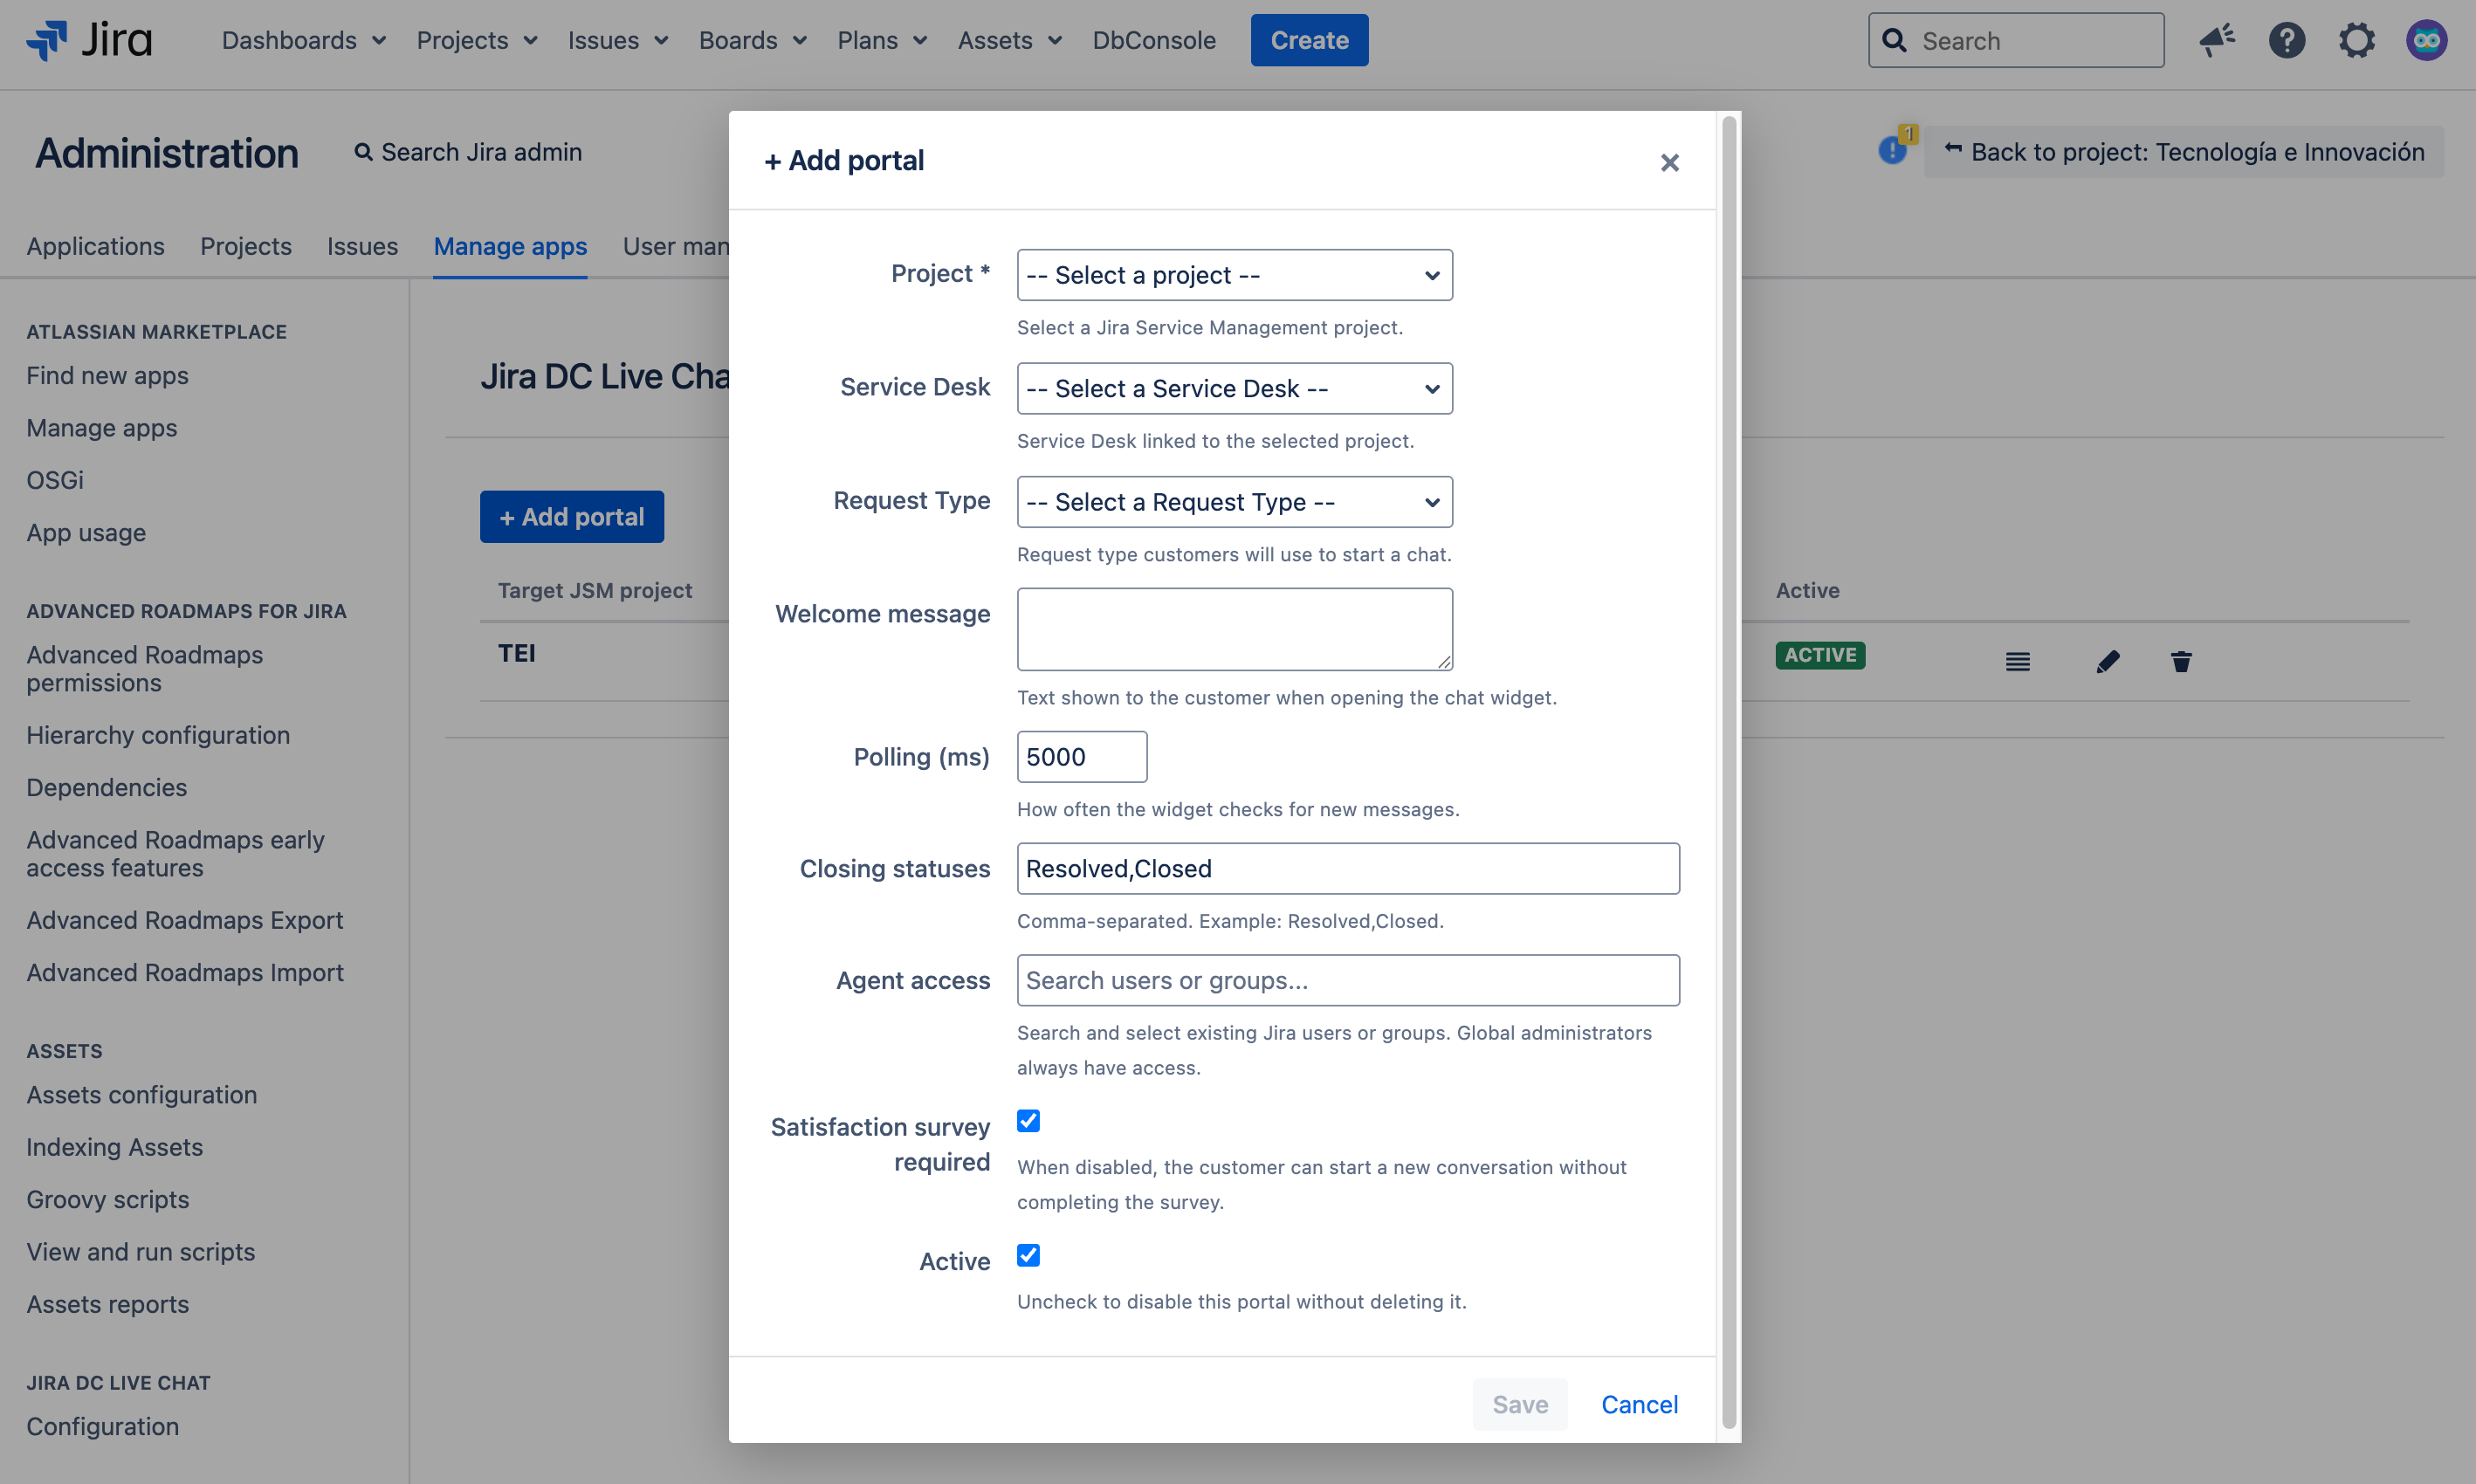
- Open Jira Administration > Manage apps > Jira Live Chat (DC).
- Click Add portal.
- Select a Jira Service Management project.
- Select the Service Desk associated with that project.
- Select the Request Type customers will use to start a chat.
- Complete the welcome message and chat closing statuses.
- If needed, configure who can handle chats and what information customers must provide when starting the conversation.
- Select Active to show the widget in that portal.
- Save the configuration.
Only Jira Service Management projects are shown. Projects from other products or types cannot be used for chat.
Editing, activating, or deactivating a portal
Select a portal from the list and click Edit to change its details. Each portal keeps its own configuration:
- Project and Service Desk where requests will be created.
- Request Type, which must include the Description field.
- Welcome message customers see when they open the chat widget.
- Agent access, which defines which users and groups can open that portal's tray.
- Polling (ms), which determines how often new messages are checked.
- Closing statuses, which indicate when the conversation ends.
- Satisfaction survey required, which indicates whether the customer must complete the survey before starting another conversation.
- Active, which controls whether the widget appears in the portal.
Clearing Active does not delete the portal configuration. The widget stops appearing and no chats are created from that portal until you activate it again.
Deleting a portal
Click Delete next to the portal you no longer want to use and confirm the action. After it is deleted, the add-on stops offering chat in that portal. This action does not delete requests or chat history that were already created in Jira.
Controlling agent access
For each portal, you can specify who may handle conversations from the Live Chat tray:
- Add authorized individual users.
- Add Jira groups whose members may handle conversations.
- Combine users and groups according to your team's needs.
Global administrators retain access even if they are not included in these lists. Access is configured per portal: authorization in one portal does not automatically grant access to others. Unauthorized users will not see Live Chat in the sidebar and cannot open that portal's tray.
Initial chat form
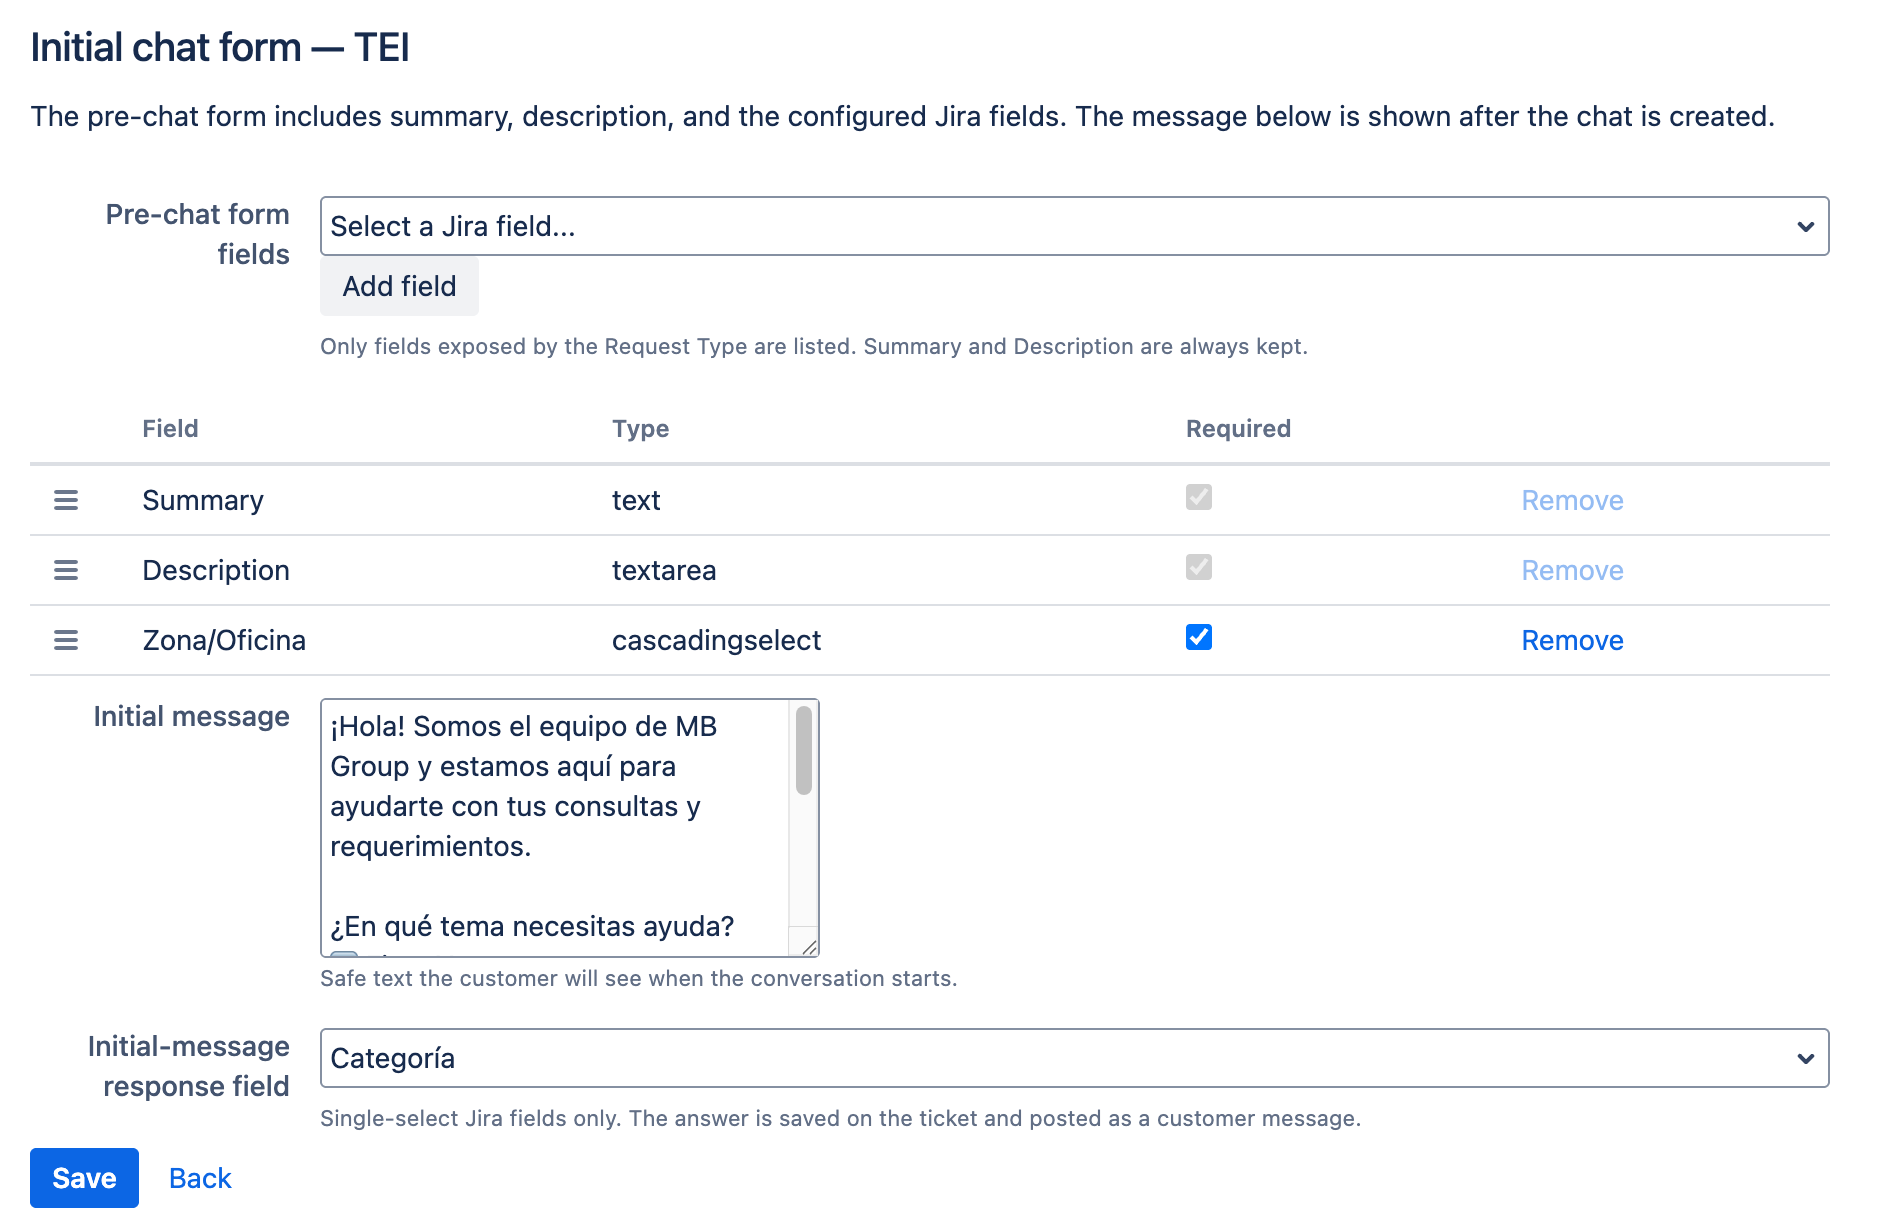
The Initial chat form is a separate section in each portal's configuration. It lets you tailor the information customers provide before creating a request, in addition to Summary and Description.
Form fields
You can add Jira fields that already exist in the request type and define the following for each one:
- The order in which it appears.
- The label customers see.
- Help text.
- Whether it is required.
Supported fields include short or long text, number, date, date and time, single selection, radio, multiple selection, checkbox, and cascading list. In a cascading list, the customer selects a primary value and then a related option, such as Region and Office. The ticket saves both values: the primary and the related one.
Only fields available for the selected request type can be chosen. If Jira requires a field, it must remain required. The add-on reuses existing fields and does not create new ones.
Since version 2.2.0, all initial form fields (summary, description, additional fields, and required fields) are included in the initial request creation. This prevents errors that could occur when the request type had required fields that the customer could not edit in a later step.
Initial message and optional selection
In the same form, you can define an Initial conversation message. After the customer submits the form, this text appears as the first chat bubble. Optionally, you can associate a single-selection field so the customer can choose a category or reason; the choice is saved on the request and appears in the conversation.
The Initial conversation message differs from the Welcome message: the initial message appears after the form is submitted, while the welcome message appears when the widget opens, before the chat starts.
If you do not configure additional fields, an initial message, or an access list, the chat keeps its usual flow.
Validations
The add-on checks the following before saving:
- There cannot be two configurations for the same Service Desk.
- A Request Type is required when the portal is active.
- The Request Type must include the Description field.
- The selected project must be a Jira Service Management project.
If information is missing or a configuration already exists for that Service Desk, a message appears so you can correct it.
Welcome message and Polling (ms)
The welcome message appears when the customer opens the widget for the first time. The suggested value is: Hello, how can we help you?. Use plain text without HTML tags.
Polling (ms) determines how often the widget checks for new messages. The default value is 5000 milliseconds (5 seconds). A lower value may display messages sooner, but it increases the number of requests to Jira.
Closing statuses and satisfaction survey
In Closing statuses, enter the workflow statuses that should end the chat, separated by commas. For example: Resolved,Closed. Enter them exactly as they appear in Jira so the Resolve option can find the correct closing transition.
The satisfaction survey is not provided by the add-on; it is Jira Service Management's standard satisfaction survey. If it is enabled for the project, the customer can complete it after the chat closes. If it is disabled, the chat closes normally and no survey is shown.
The Satisfaction survey required option determines whether the survey is mandatory before starting a new conversation:
- Enabled: the customer must complete the survey before starting another chat.
- Disabled: the customer can start a new conversation without completing the survey.
Migration from version 1.x
When updating from an earlier version, the previous single configuration is automatically converted into the first entry in the portals list. If it had a valid Service Desk and request type, the entry is created as Active.
Migration preserves the destination and behavior of the portal that was already configured. You do not need to create that configuration again. After updating, you can add, edit, activate, deactivate, or delete portals from the same screen.