Live Chat Tray
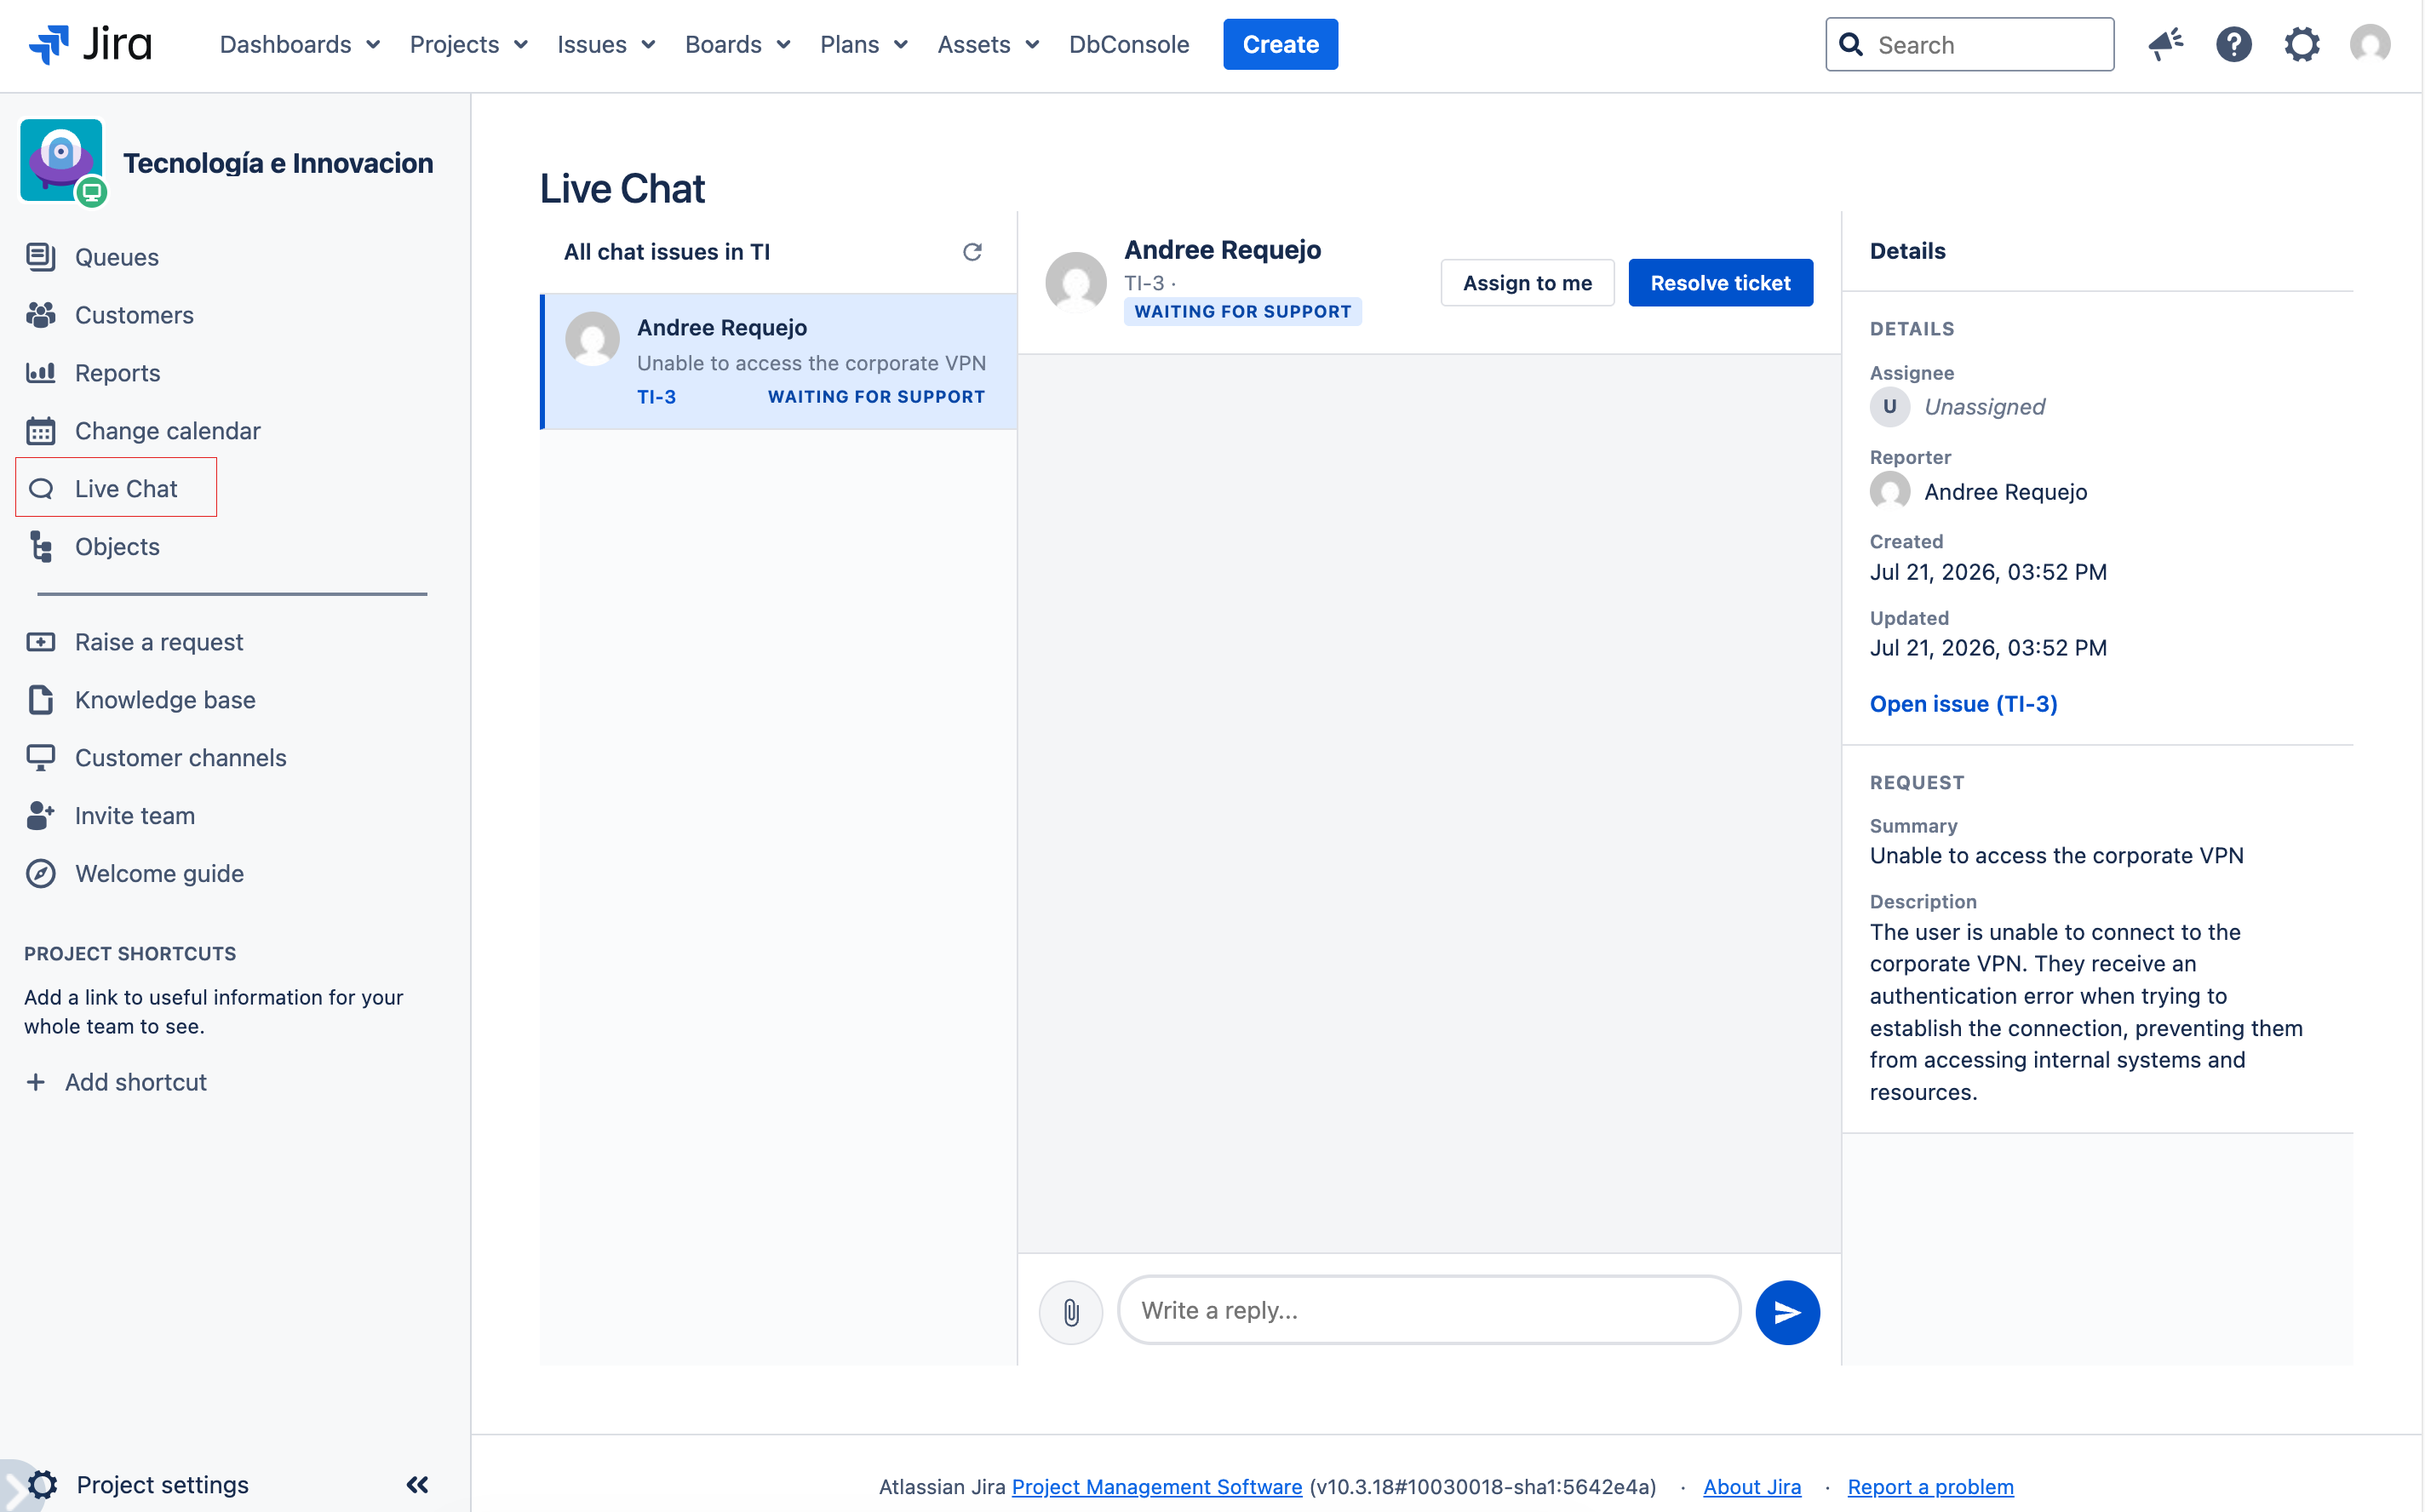
The agent tray integrates into the JSM project sidebar, following the pattern of the Queues and Customers sections. It provides a centralized view for managing all active chat sessions.
Accessing the Tray
- Navigate to a Jira Service Management project.
- In the project sidebar, locate the Live Chat section.
- Click on Live Chat to open the active sessions view.
Three-Column Layout
The tray is organized into three columns for efficient conversation management:
Column 1: Active Sessions
Displays the list of all active chat sessions in the project.
- Customer: Name of the customer who started the chat.
- Summary: Brief description of the chat reason.
- Status: Visual indicator of the status (active, awaiting response, closed).
- Elapsed time: Time since the last message.
- Click on a session to select it and view its conversation in the center column.
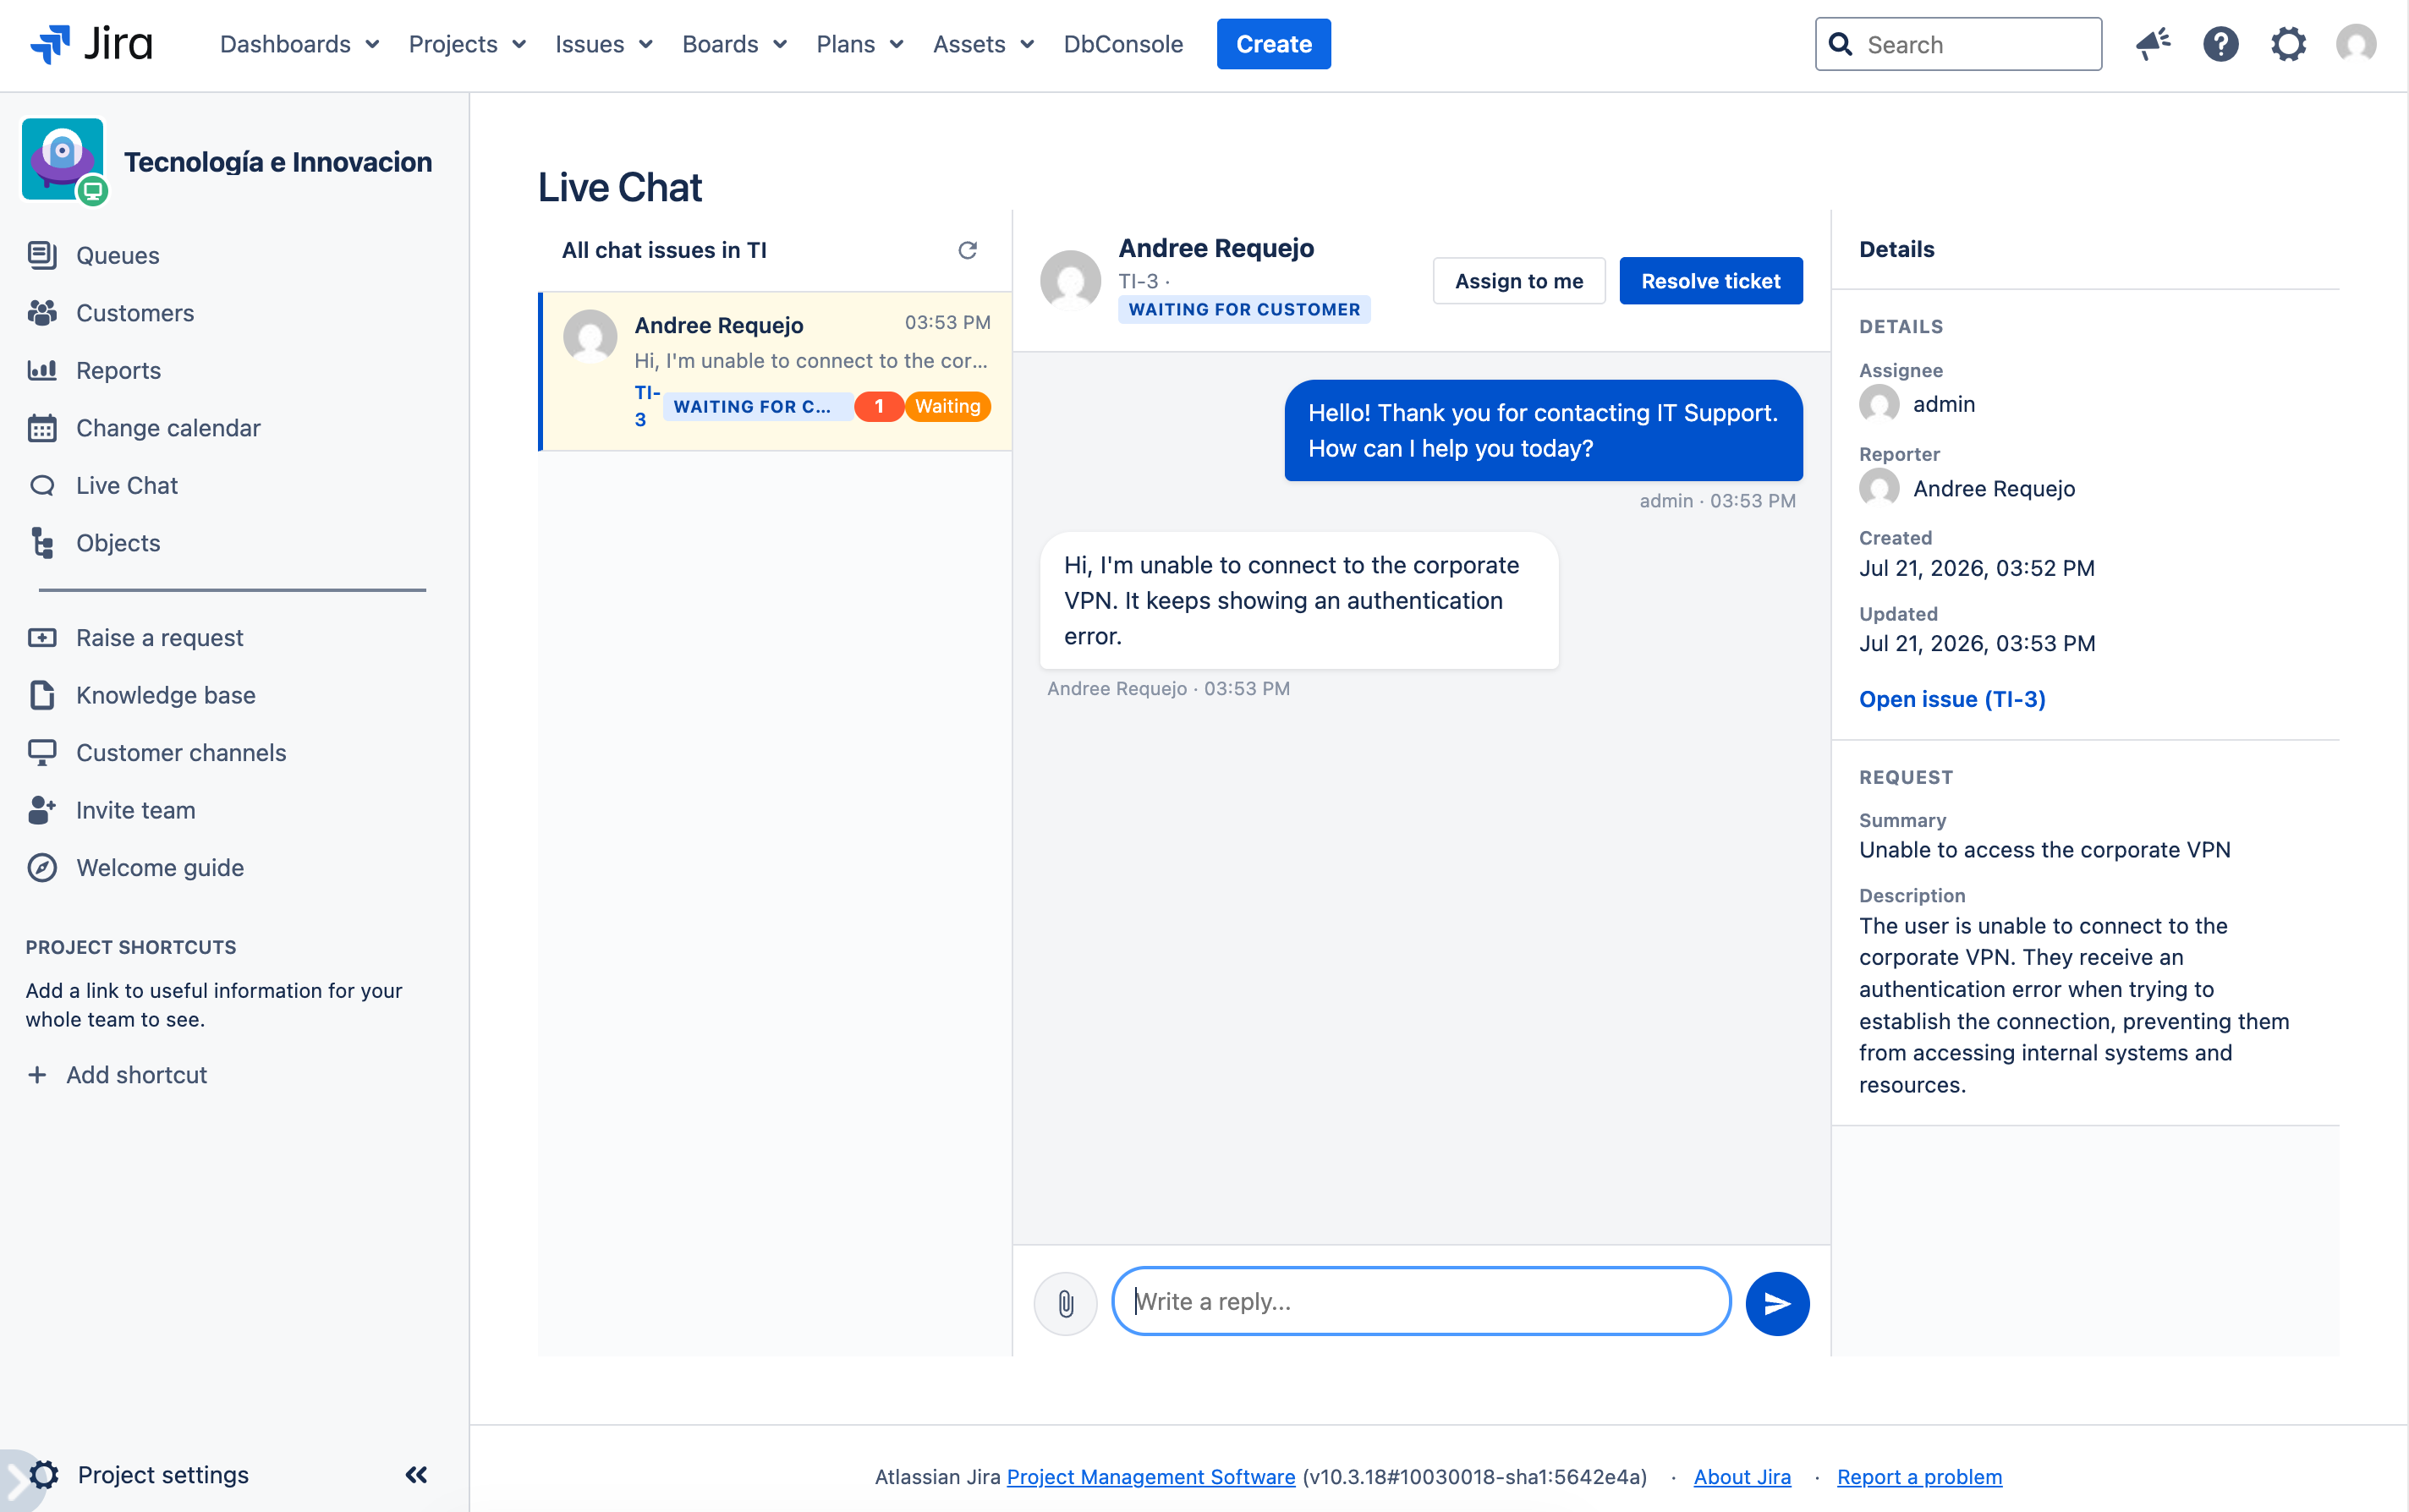
Column 2: Conversation
Displays the message history of the selected session.
- Message bubbles: Customer messages appear left-aligned; agent messages appear right-aligned.
- Attachments: Click the attach icon to select one or more files from your computer. Images are previewed inline; other files show a download link.
- Reply field: At the bottom, type your message and click Send or press Enter.
- Assign to me: Assigns the request to your user to manage the conversation.
- Resolve: Closes the chat session and resolves the associated issue.
Column 3: Request Details
Shows the information of the JSM issue linked to the session.
- Summary: Issue title.
- Description: Description provided by the customer when starting the chat.
- Requester: Customer who created the chat.
- Created date: When the session was started.
Closing a Session
When the customer's issue has been resolved:
- From the conversation column, click Resolve.
- Confirm the action. The issue will be marked as resolved and the chat session will end.
- The customer will see a message indicating that the chat has been closed.