Creating the Field
Once the add-on is installed, you can create "Issue Picker" custom fields just as you would with any other field type in Jira.
Steps to Create the Field
-
Navigate to Custom Fields:
- In your Jira instance, click the Settings icon (cogwheel) in the top right corner.
- Select Issues from the dropdown menu.
- In the left sidebar, under the FIELDS section, click Custom fields.
-
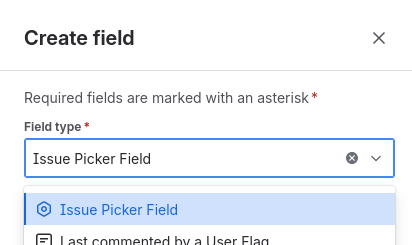
Create a New Field:
- Click the Create custom field button.
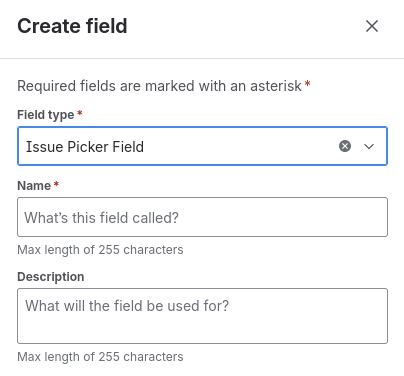
- A side menu will open. Search for and select the Issue Picker Field type.
- Enter a Name for your field (e.g., "Related Issues," "Depends on"). This is the name users will see.
- Provide a Description (optional) to clarify the field's purpose.
- Click Create.
That's it! You have created your first Issue Picker field.
-
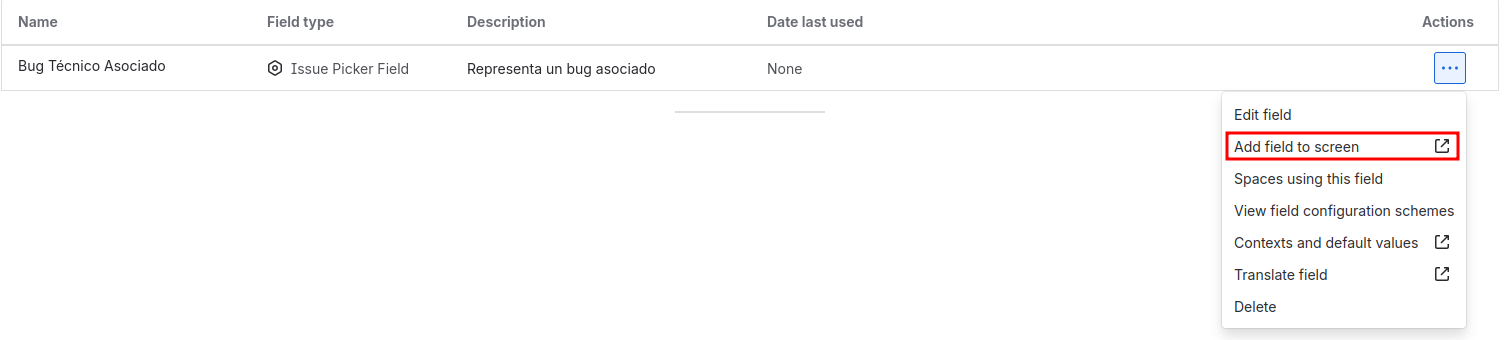
Associate the Field with your Screens:
- After creating the field, Jira will enable it for you to associate with one or more screens in your projects.
- Find the field with the name you created.
- In its settings, select the Add field to screen option.
- Check the boxes for the screens where you want the field to appear (e.g.,
PROJECT: Create Issue Screen,PROJECT: Edit/View Issue Screen).

- Click Update.
Now that the field exists, the next step is to configure its behavior and appearance.