Field Configuration
Quick access: You can also get to this same configuration page from the Fields Dashboard, which centralizes all your Dynamic Work Item Picker fields.
The Dynamic Work Item Picker field configuration is integrated directly into the Jira Cloud administration, allowing you to manage its behavior from the same place you manage the rest of your custom fields.
Where to find the configuration?
To start configuring your field, follow these steps:
- From the main Jira navigation, go to Settings (⚙️) and then to Work Items.
- In the left sidebar, under the FIELDS section, click Custom fields.
- Find your Dynamic Work Item Picker Field type field in the list. On the right, click the actions menu (•••) and select Contexts and default value.

- Within the field's context settings, you will find the link to Edit custom field configuration. Clicking it will open the Field Rules and Appearance configuration modal.

Field Rules and Appearance per Context
This section centralizes the behavior and display of your Dynamic Work Item Picker field. In version 2.4.0, we have optimized Context management, fully integrating it with Jira's native configuration to allow you to apply precise rules based on your project's scope.
How to manage Contexts?
Now, field logic segmentation is done directly through Jira's native context configuration. This allows for greater flexibility when linking rules to specific combinations of projects and issue types.
-
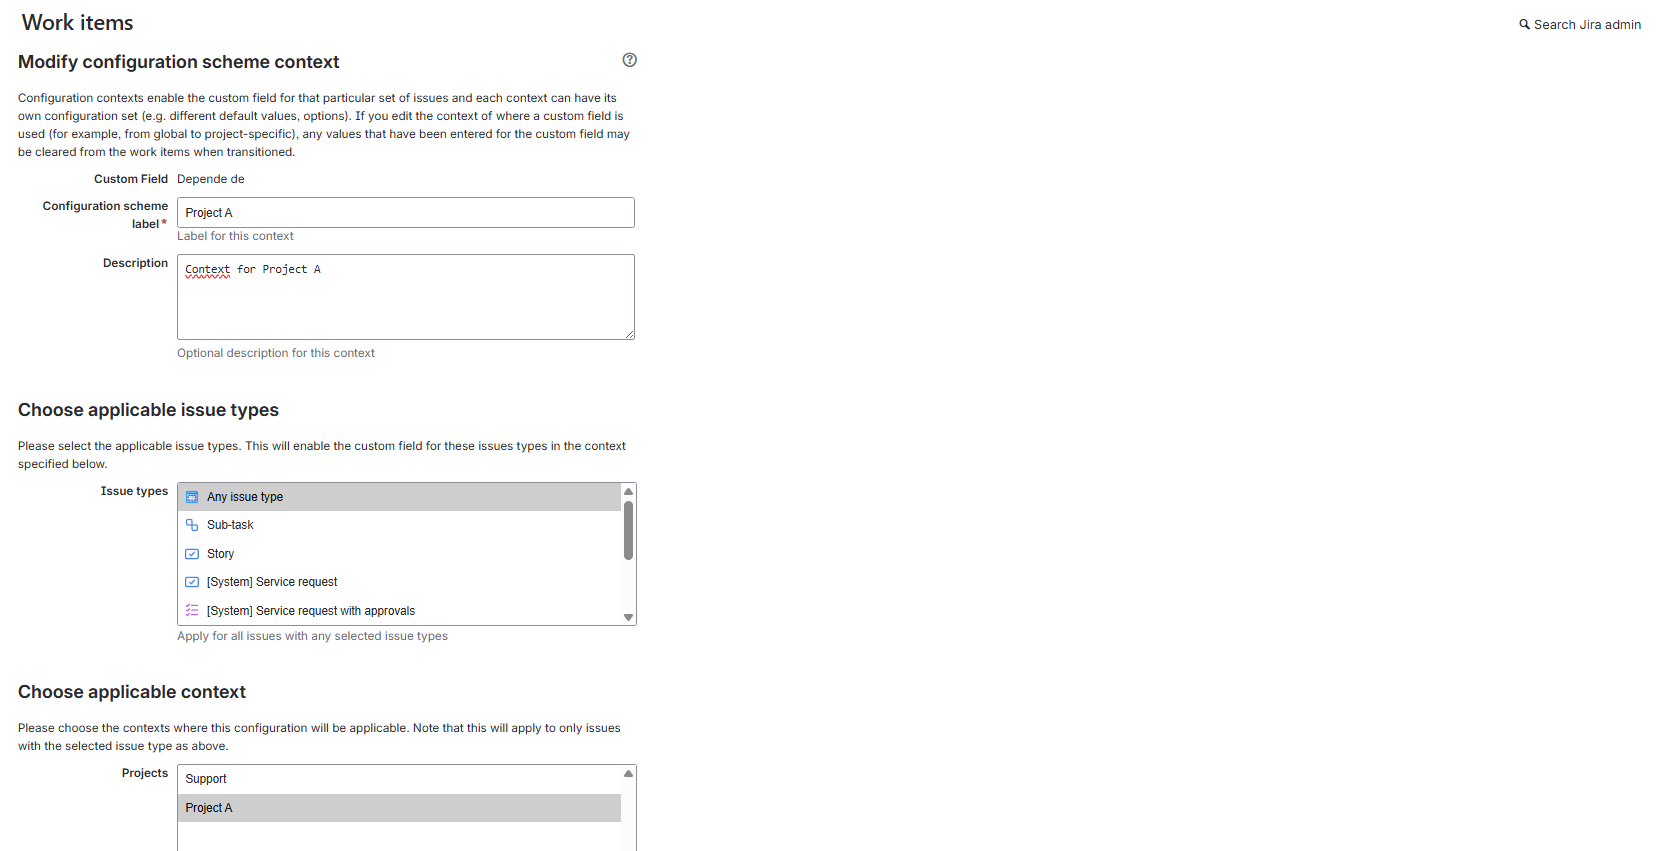
Add Context: In the Jira field configuration screen, click Add new context.

-
Configure Scope: Define a name for the context and select the Projects and Issue Types where this configuration will apply.
-
Access Plugin Configuration: Once the context is created, you will see a list of configured contexts. Click Edit custom field configuration within the context you wish to customize.
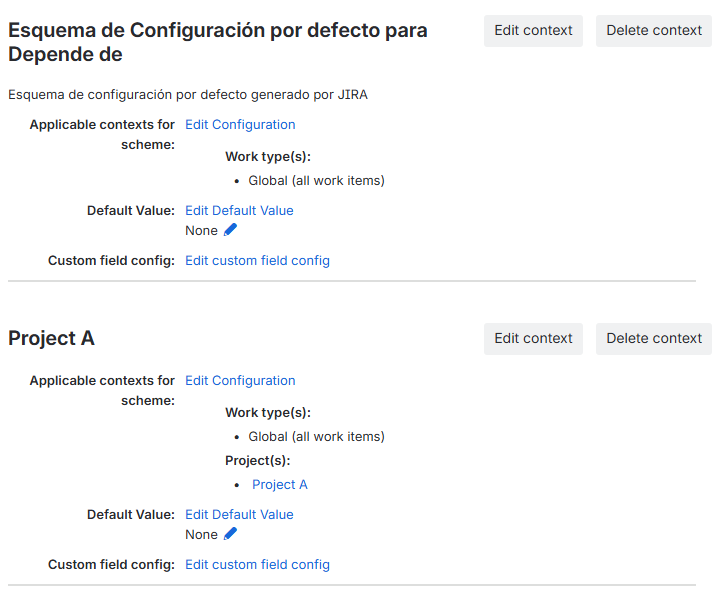
Each context acts as an independent container that encapsulates its own settings for the General Information and View tabs. This allows the same field to behave completely differently across different projects.
The scope defines exactly where in Jira the rules of this context will be applied. You can segment the configuration as follows:
- Global Scope: Applied by default to all projects (Spaces) and work types that do not have a more specific rule defined. This is ideal for general company rules.
- Specific Scope (Projects and Work Types): You can restrict the configuration to work only in selected projects or for specific work types (e.g., only for "Bugs" or only for the "Customer Support" project).
When you define a specific scope, the Dynamic Work Item Picker field will automatically adapt its behavior only when displayed within that context, allowing for complete per-team customization. Please note that you can only create one context per project.
Configuration per Context
Each context (including Global) has two configuration tabs:
General Information Tab
Here you define the business rules for your field for the selected context.
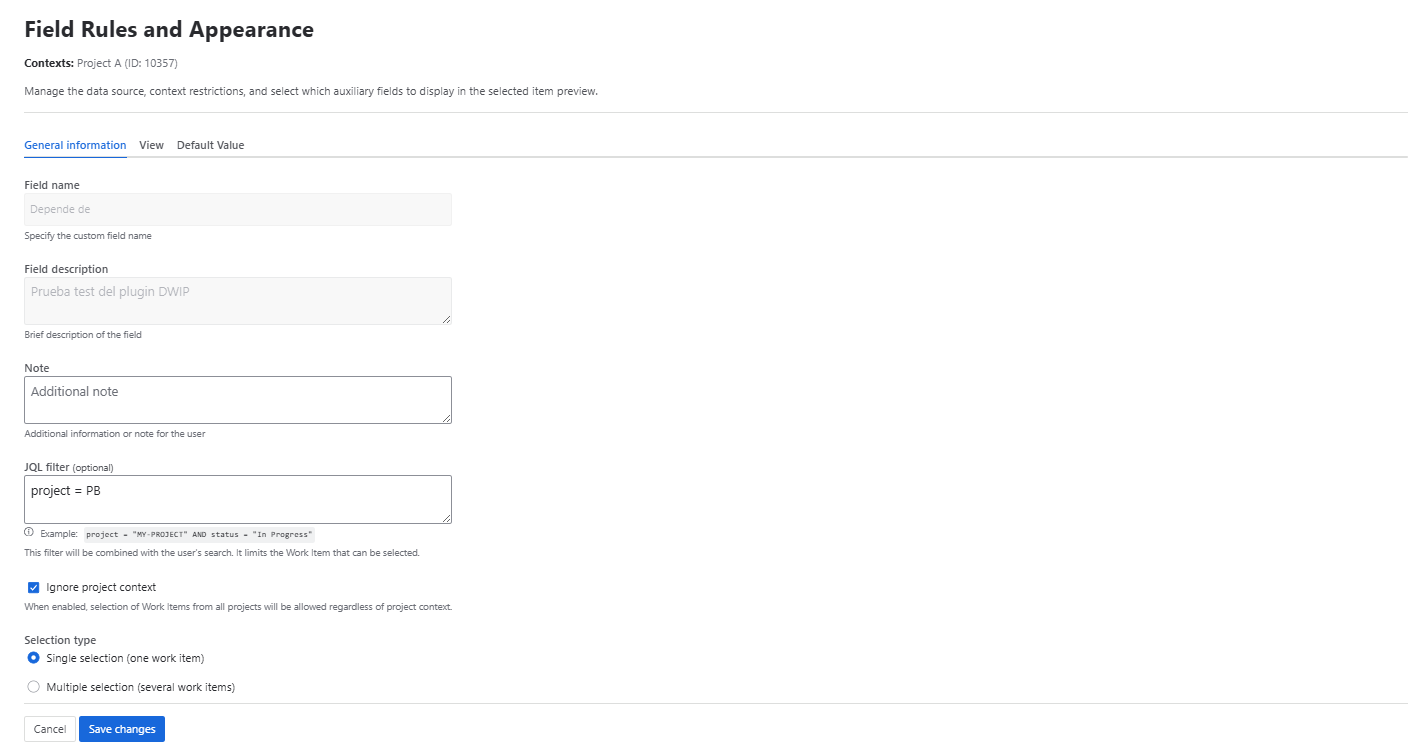
Limit selectable work items with JQL
Use the JQL Filter field to create a query that filters the work items users can find and select. This is ideal for ensuring that only relevant work items are linked.
- Use case: If you want a field to only allow linking "Bugs" from the current project that have not been closed, you could use a JQL like:
project = currentProject() AND issuetype = Bug AND status != Closed
JQL Validation on Edit
The Dynamic Work Item Picker field includes an intelligent validation to maintain data integrity when the JQL filter is changed.
- What happens if I change the JQL and there are work items that no longer meet the new condition?
- The
work itemsthat were already selected in the field will be kept, but when editing thework item, the user will see a warning above the field indicating whichwork itemsare no longer valid.
- The
This prevents the loss of historical data and, at the same time, ensures that new selections adhere to the rules you have defined.
Dynamic Variable Support in JQL
To make your JQL filters even more powerful and contextual, the field supports the use of dynamic variables. These variables are automatically replaced when the query runs: some take values from the work item where the field is shown; others, from the field context (configured space and work type).
The supported variables are:
From the current work item:
{{currentUser}}: Is replaced by theaccountIdof the user currently viewing the work item. Ideal for showing only work items assigned to the current user.{{issue.key}}: Is replaced by the key of the current work item (e.g.,PROJ-123).{{issue.issuetype}}: Is replaced by the name of the current work item's type (e.g.,Bug,Story).{{issue.priority}}: Is replaced by the name of the current work item's priority (e.g.,High,Medium).{{issue.project}}: Is replaced by the key of the space the current work item belongs to (e.g.,PROJ).{{issue.customfield_xxxxx}}: Is replaced by the value of a custom field in the current work item. Replacexxxxxwith the custom field ID (e.g.,{{issue.customfield_10001}}).
From the field context:
{{context.project}}: Is replaced by the key of the field's active space context (e.g.,TESTAB).{{context.issueType}}: Is replaced by the name of the work type in the field's active context (e.g.,Task).
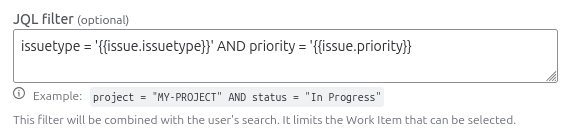
Example usage (current work item):
To show only issues of the same type and with the same priority as the current issue, you could use:
issuetype = '{{issue.issuetype}}' AND priority = '{{issue.priority}}'
Example usage (field context):
To filter by the space and work type of the context where the field applies:
project = {{context.project}} AND issuetype = {{context.issueType}}
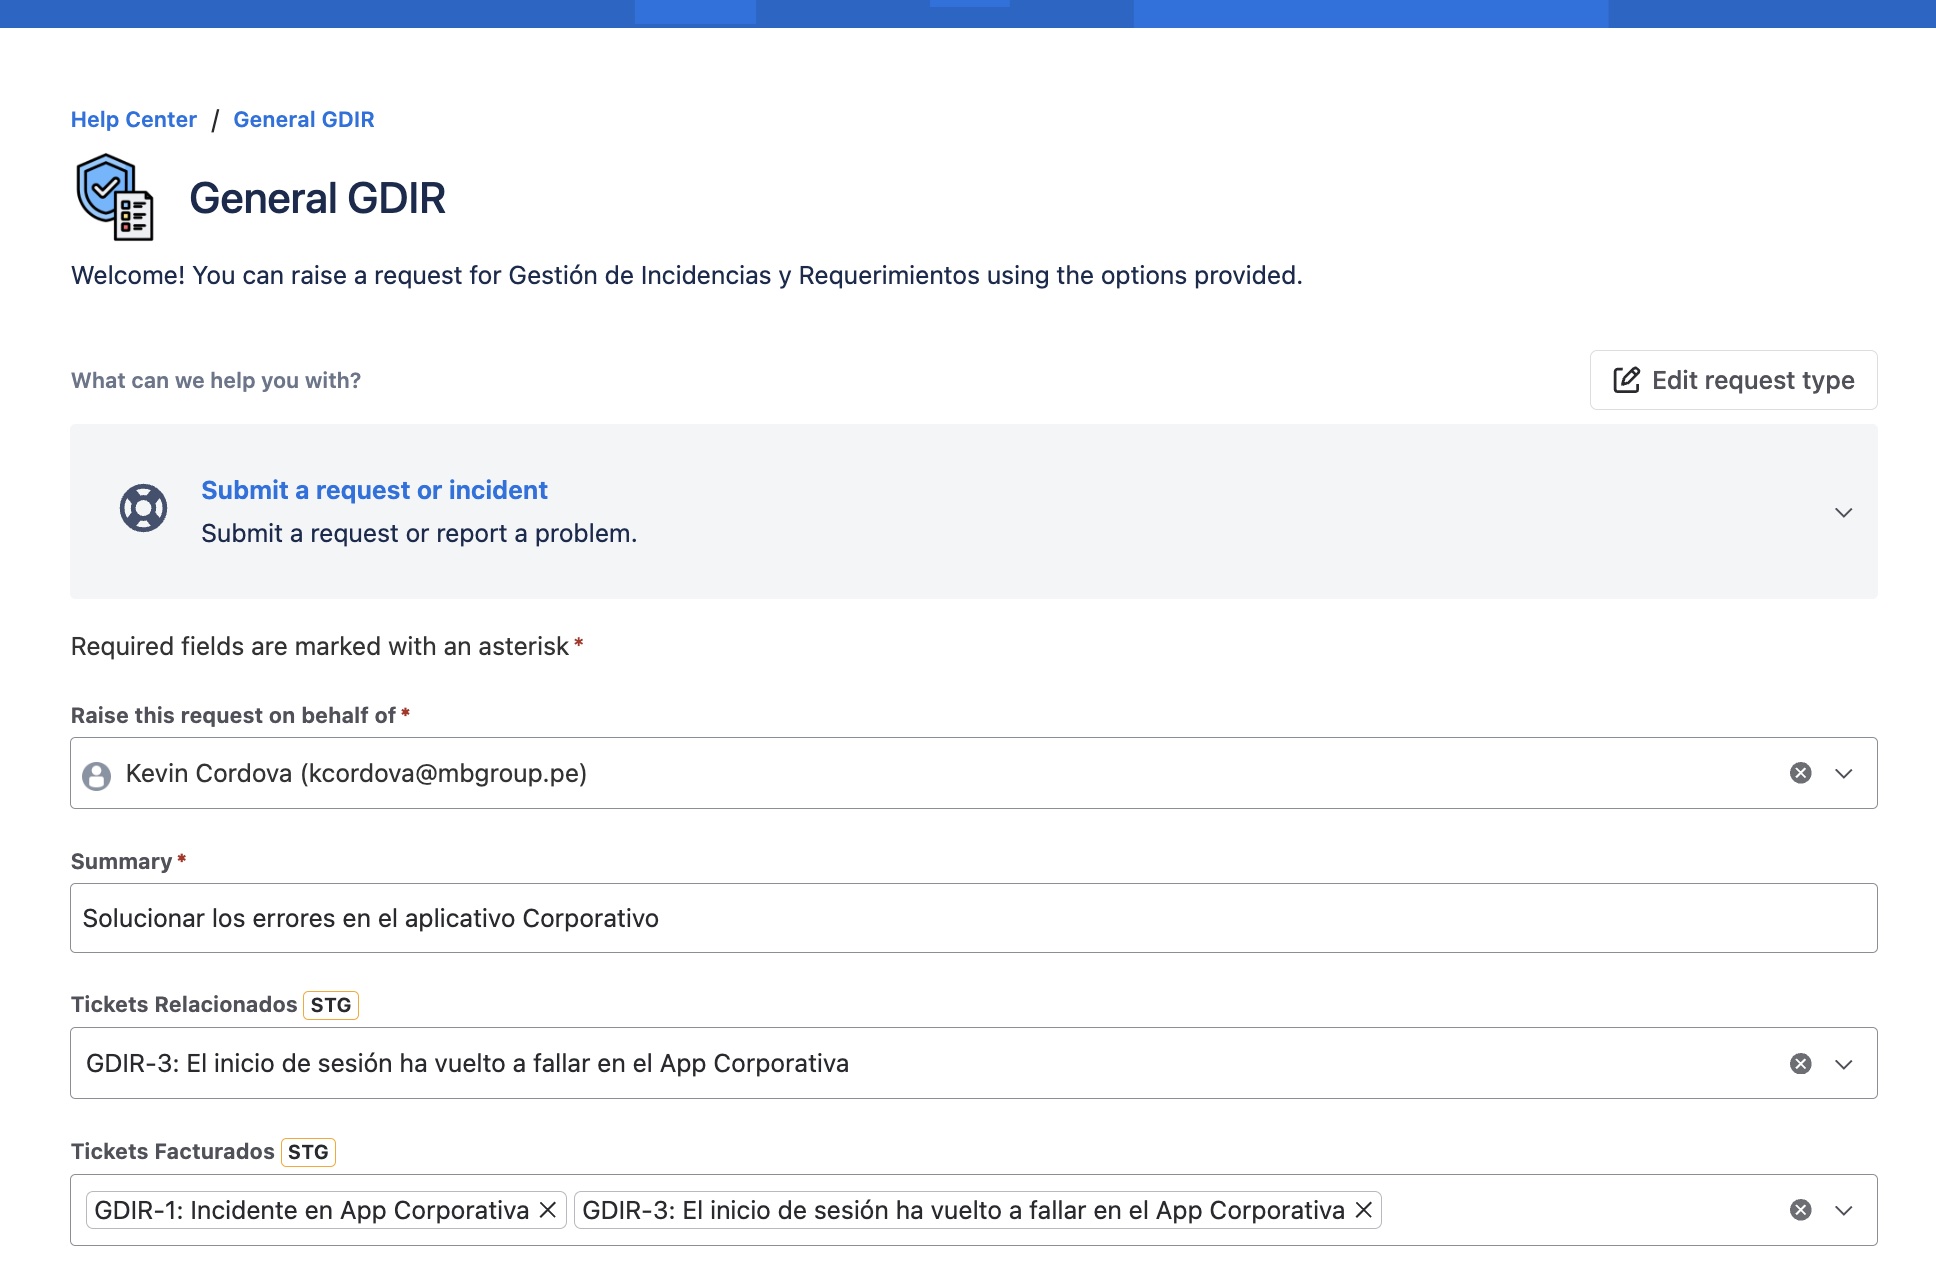
Enable multiple selection
By default, the field only allows selecting one work item. If you need to link multiple work items, change the Selection type to Multiple selection.
Ignore project context
By default, the picker limits the search for work items to the current project to maintain relevance. By checking the Ignore project context option, you allow users to search and select items from across the entire Jira instance.
- JSM Support: This feature is fully operational in Jira Service Management (JSM) projects, allowing global searches from both the Agent view and the Customer Portal.
- Behavior:
- Unchecked: Search is restricted to the current project (recommended for focus).
- Checked: Enables searching across all projects in the instance.
Add a help note
The Note field allows you to write a short text as a visual aid for users who access the field configuration.
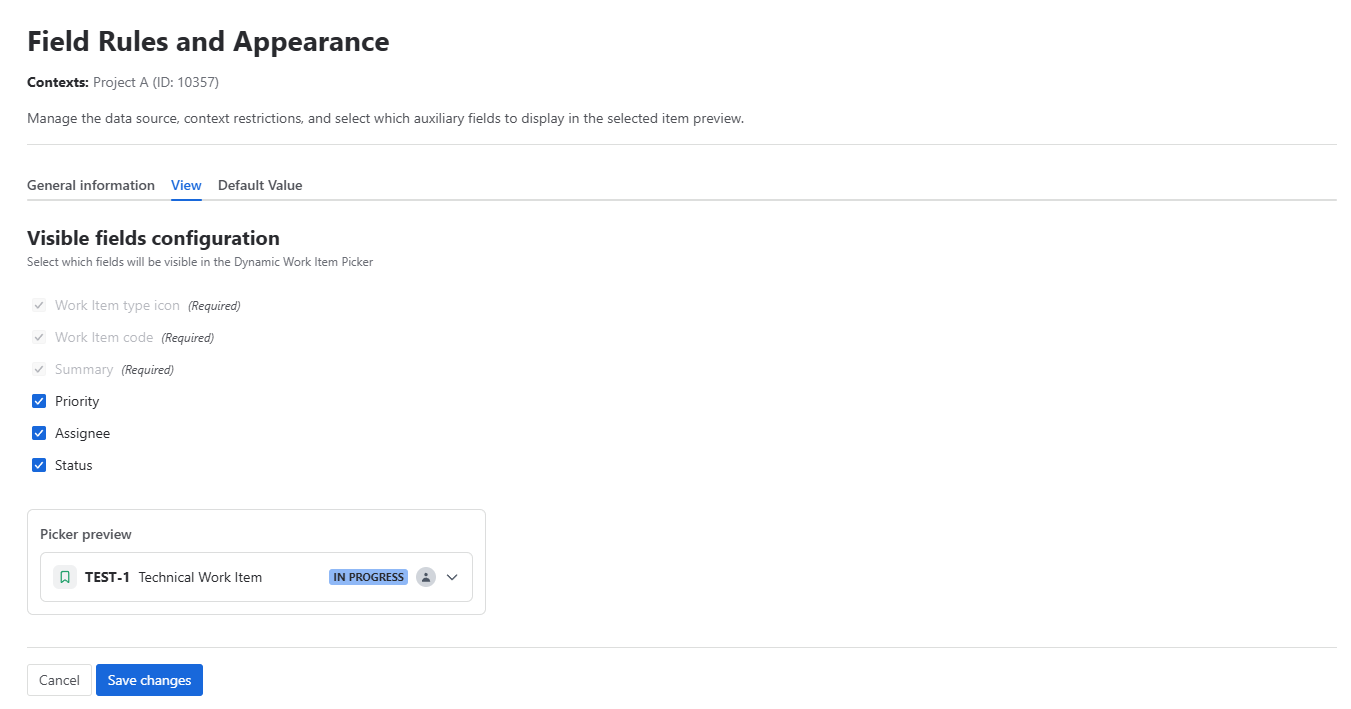
View Tab
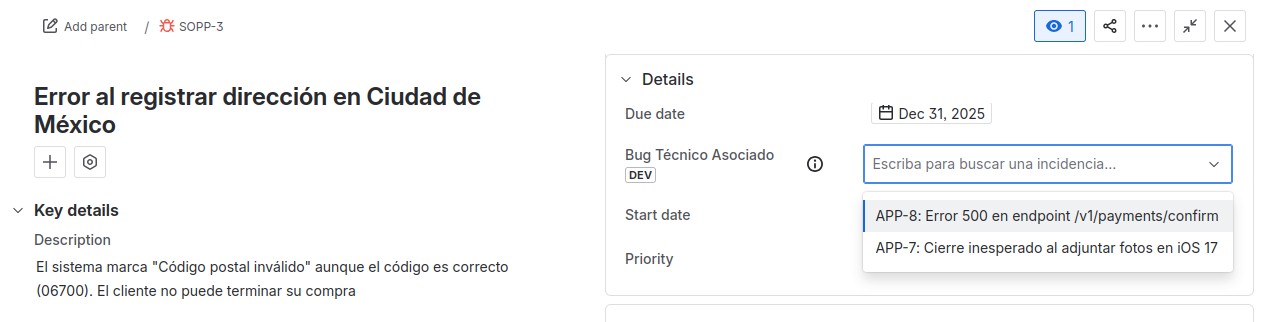
Here you customize the information displayed for the selected work items, giving your team context at a glance without needing to open the work item in a new tab.
Enrich the field display
In addition to the icon, key, and summary of the work item (which are always displayed), you can choose to show:
- Assignee: Shows the avatar of the work item's assignee.
- Status: Shows the current status of the work item with its corresponding color (e.g., "In Progress," "Done").
- Priority: Shows the work item's priority icon.
By activating these options, the information will appear directly in the work item view where the field is used, as seen in the following image:

Once you finish adjusting the settings, don't forget to click Save Changes.
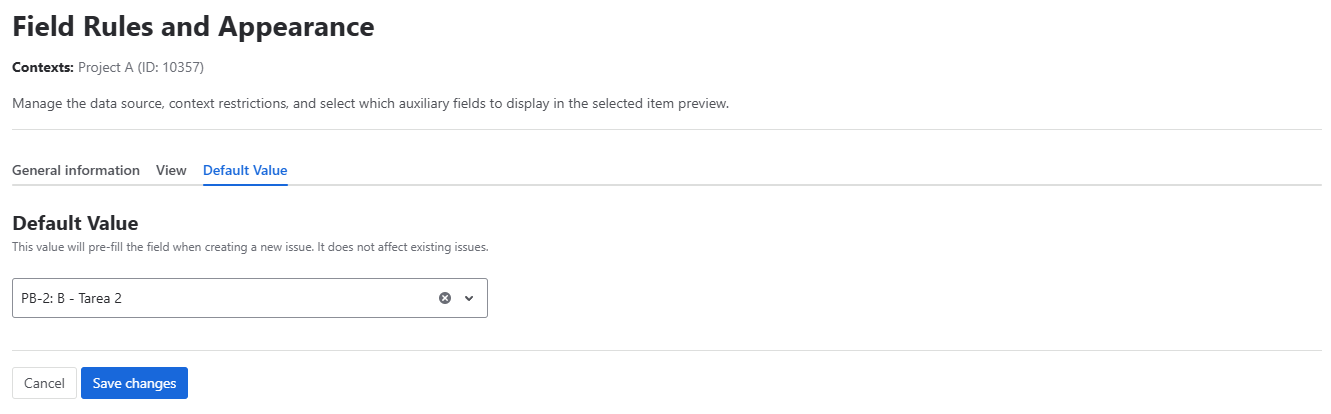
Default Value Tab
You can set a default value for your field, allowing you to search and select an issue directly from the context configuration screen.
JQL Search
All Dynamic Work Item Picker fields are indexed by Jira, and their content can be searched via JQL. This allows you to create advanced queries, filters, and dashboards based on the values of your Dynamic Work Item Picker fields.
How it works
When you select an work item in an Dynamic Work Item Picker field, the field stores the key of that work item (e.g., PROJ-123). Therefore, your JQL searches should use the work item keys to filter.
Supported Operators
You can use the standard JQL operators for text fields, such as:
| Operator | Search Example |
|---|---|
= | "My Dynamic Work Item Picker Field" = "PROJ-123" |
!= | "My Dynamic Work Item Picker Field" != "PROJ-123" |
IN | "My Dynamic Work Item Picker Field" IN ("PROJ-123", "PROJ-456") |
NOT IN | "My Dynamic Work Item Picker Field" NOT IN ("PROJ-123", "PROJ-456") |
IS | "My Dynamic Work Item Picker Field" IS EMPTY |
IS NOT | "My Dynamic Work Item Picker Field" IS NOT EMPTY |
Remember to replace
"My Dynamic Work Item Picker Field"with the actual name of your custom field.
Using the Field in Workflow Transitions
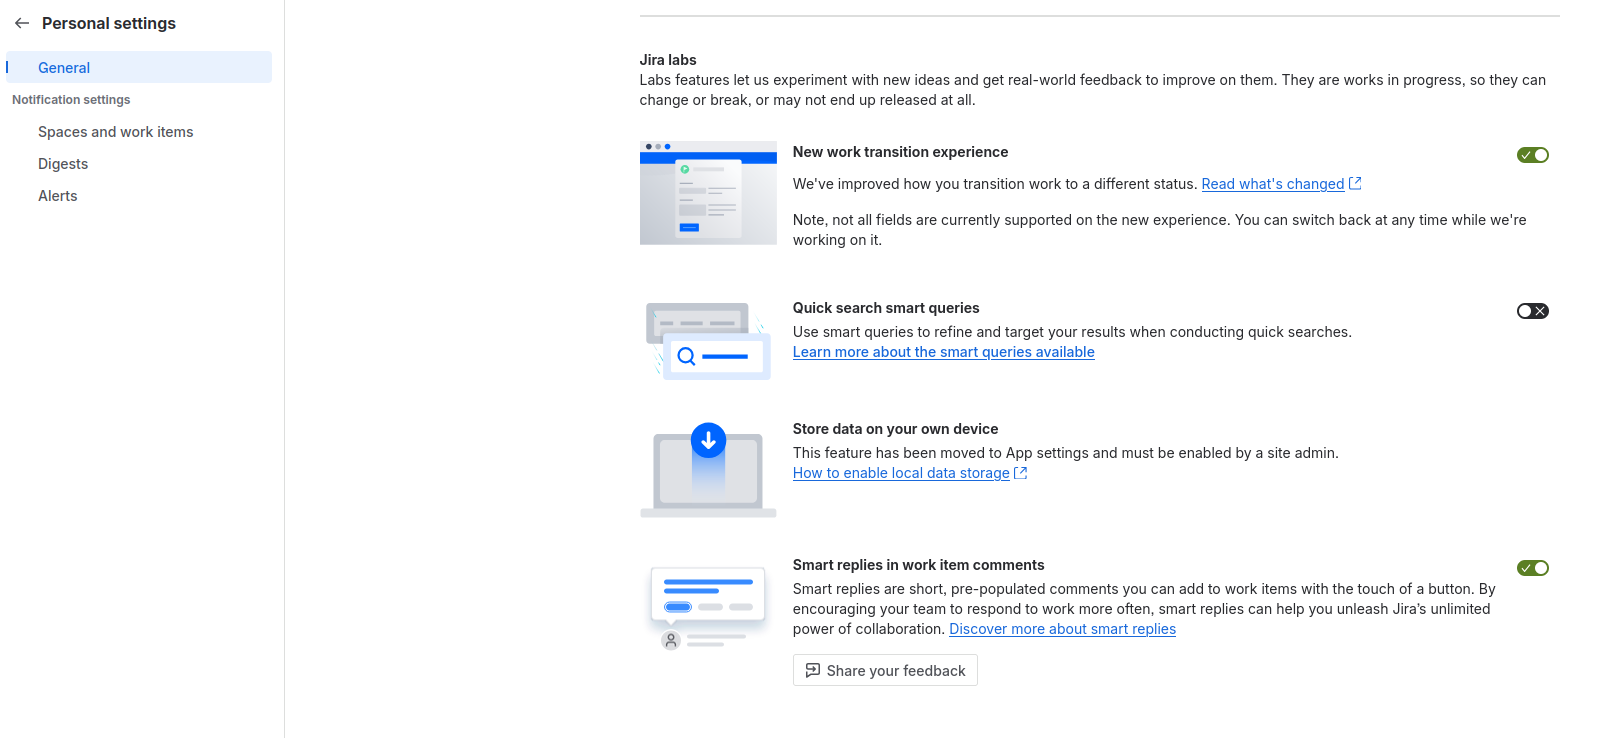
If you want to use the Dynamic Work Item Picker field on a workflow transition screen (for example, when closing or resolving a work item), you may need to enable Jira's new transition view, which is currently a "Labs" feature.
Follow these steps to activate the new transition experience:
- Log in to your Jira account.
- Click on your profile icon in the top right corner and select Account settings.
- On the account settings page, go to the Product settings tab.
- Locate and select the Jira instance you wish to modify (each instance is presented as a link).
- Once in the instance's settings, navigate to the General tab.
- Find the Jira Labs section and enable the New transition experience option.
Once this feature is enabled, you will be able to add your custom field to transition screens, and it will work as expected.