Time tracking provider activation
LogSense for Jira can operate as Jira Cloud's time tracking provider (Forge module jira:timeTrackingProvider, key logsense-time-provider). This is the recommended way to use the app in version 2.0.0.
When to activate the provider
| Scenario | Behavior |
|---|---|
| Jira native tracking | Standard Log work UI is active, without LogSense metadata. |
| LogSense as provider | Native Log work UI disappears. Logging goes through LogSense (modal, Work log tab, provider admin). |
Activation steps
- With site administrator permissions, open Settings (⚙️).
- Go to Work items → Time tracking.
- Under Time tracking provider, select LogSense.
- Save configuration.
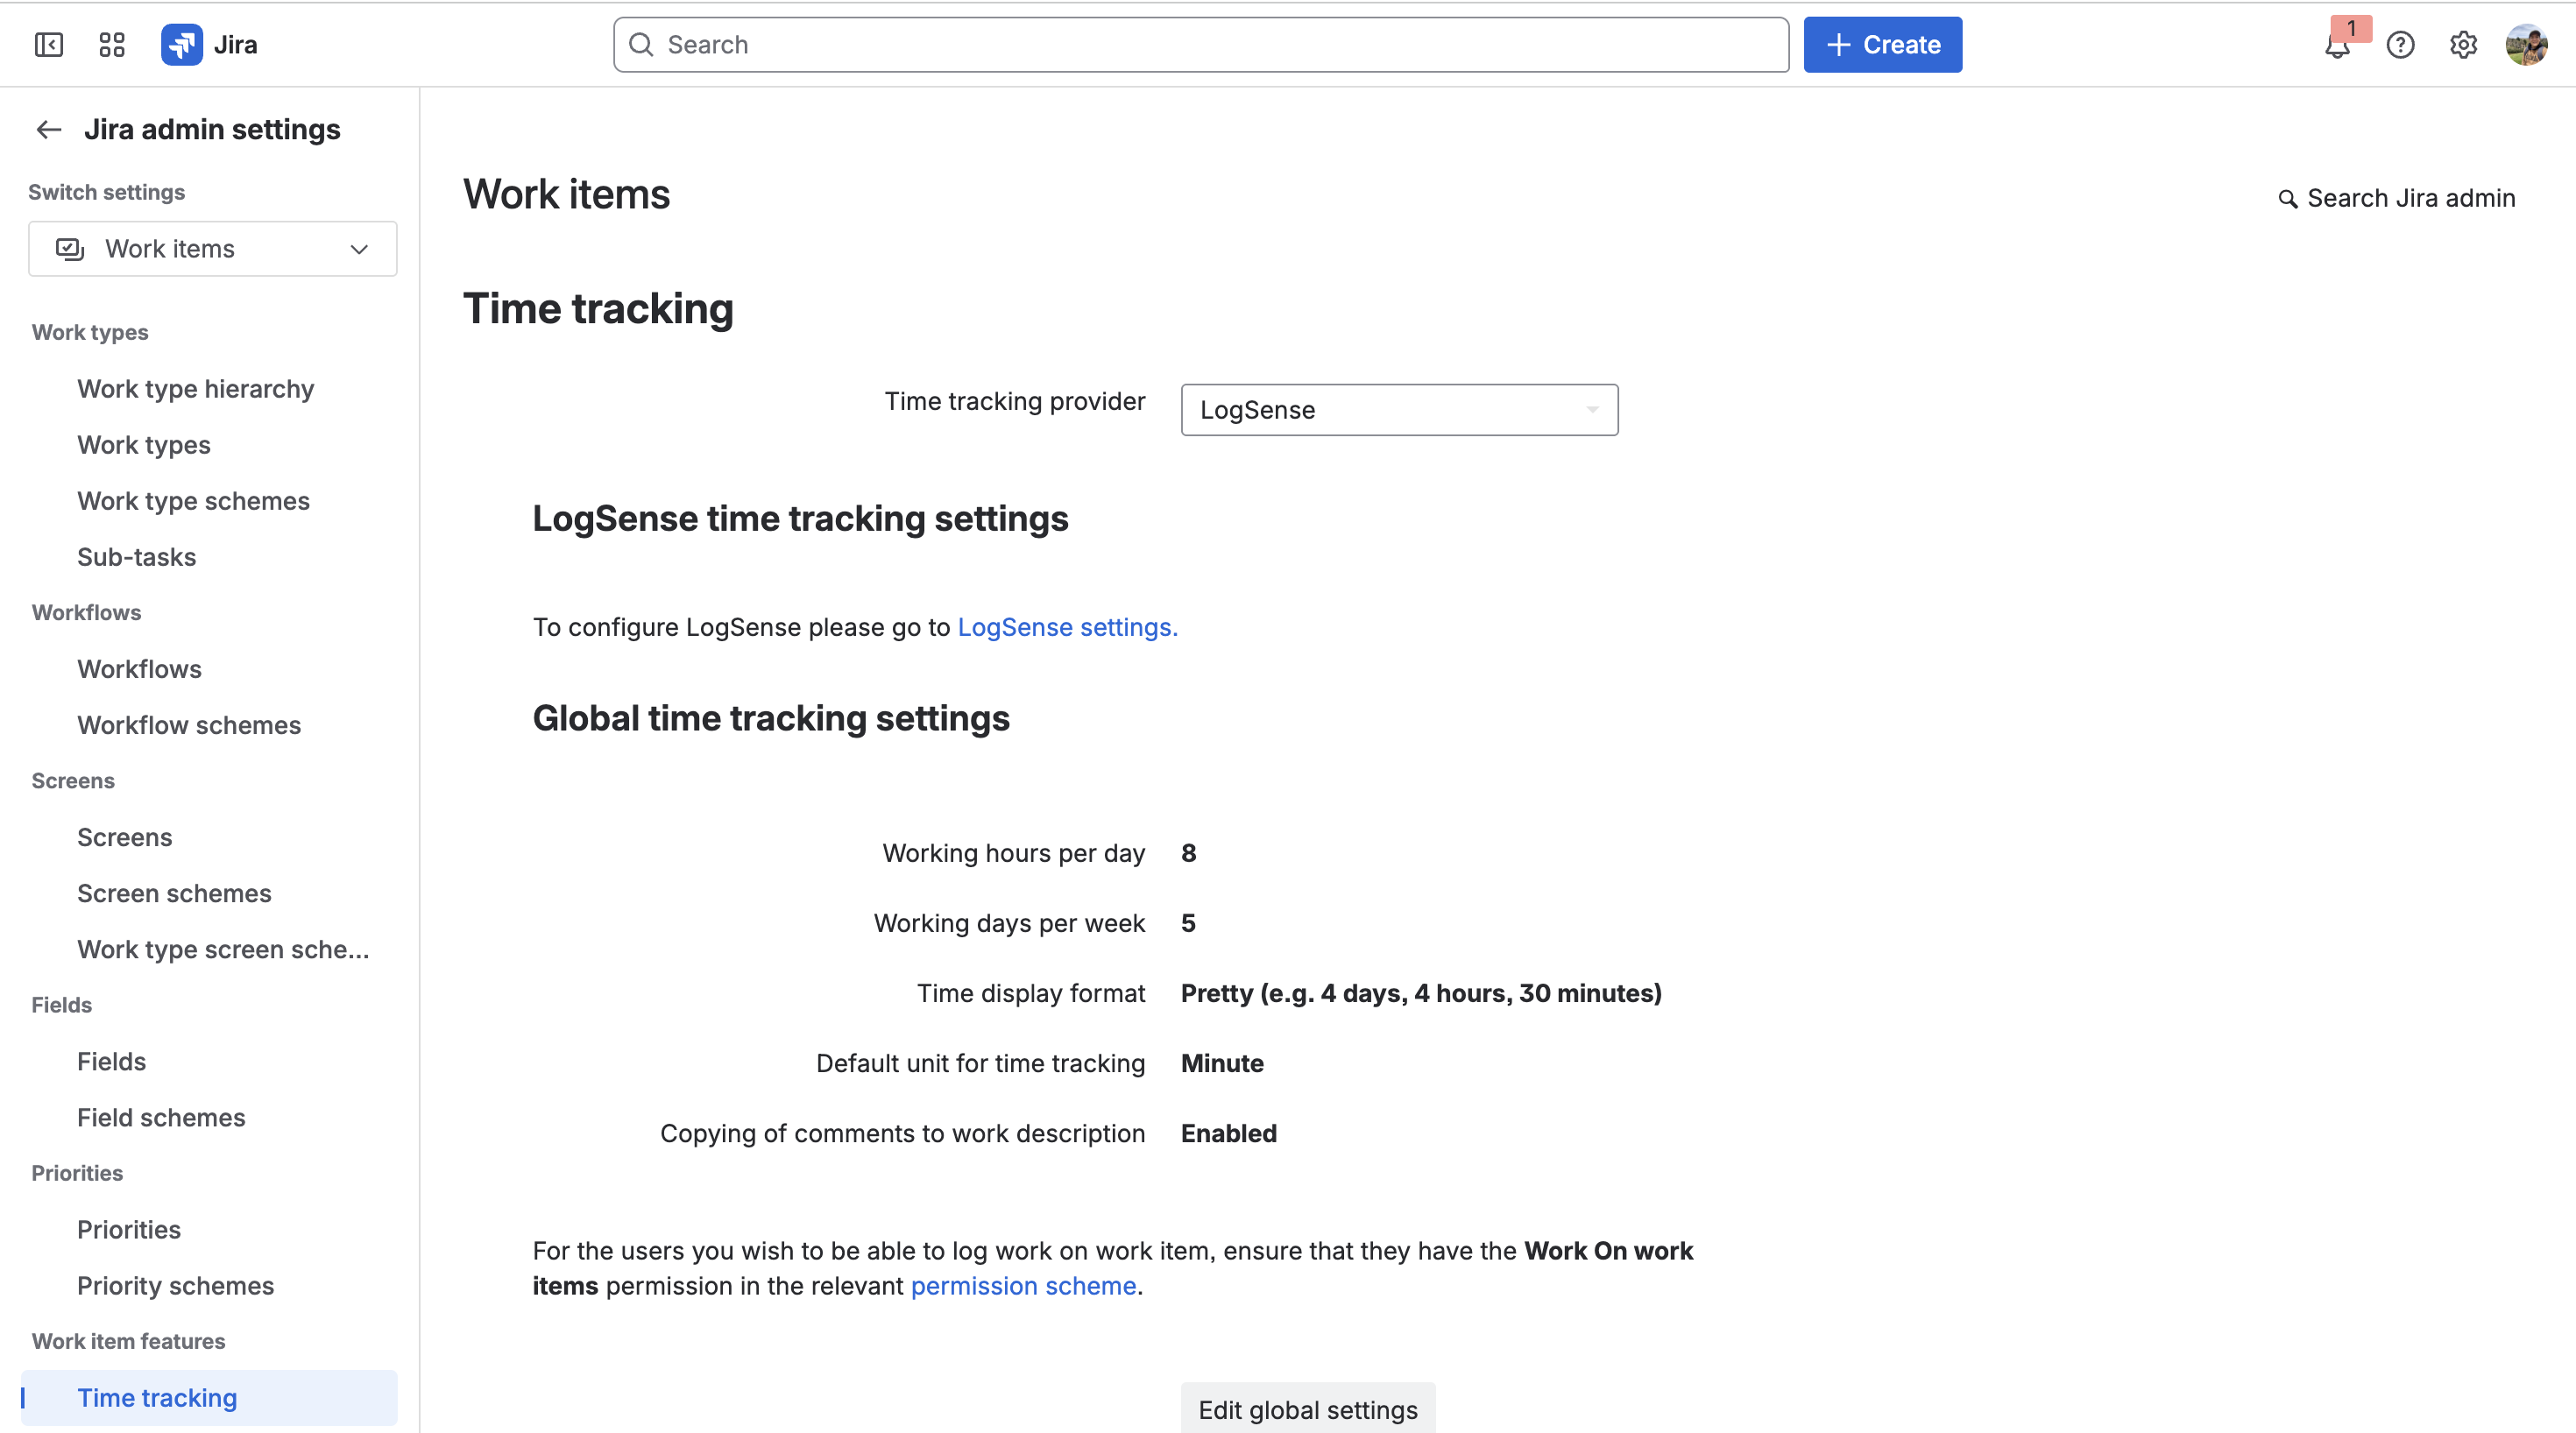
Entry points after activation
| Forge module | Jira surface | Description |
|---|---|---|
jira:issueAction | Log work issue action | Logging modal with LogSense metadata. |
jira:issueActivity | Work log tab | History and logging in issue activity. |
jira:adminPage | Provider administration | Time tracking provider configuration. |
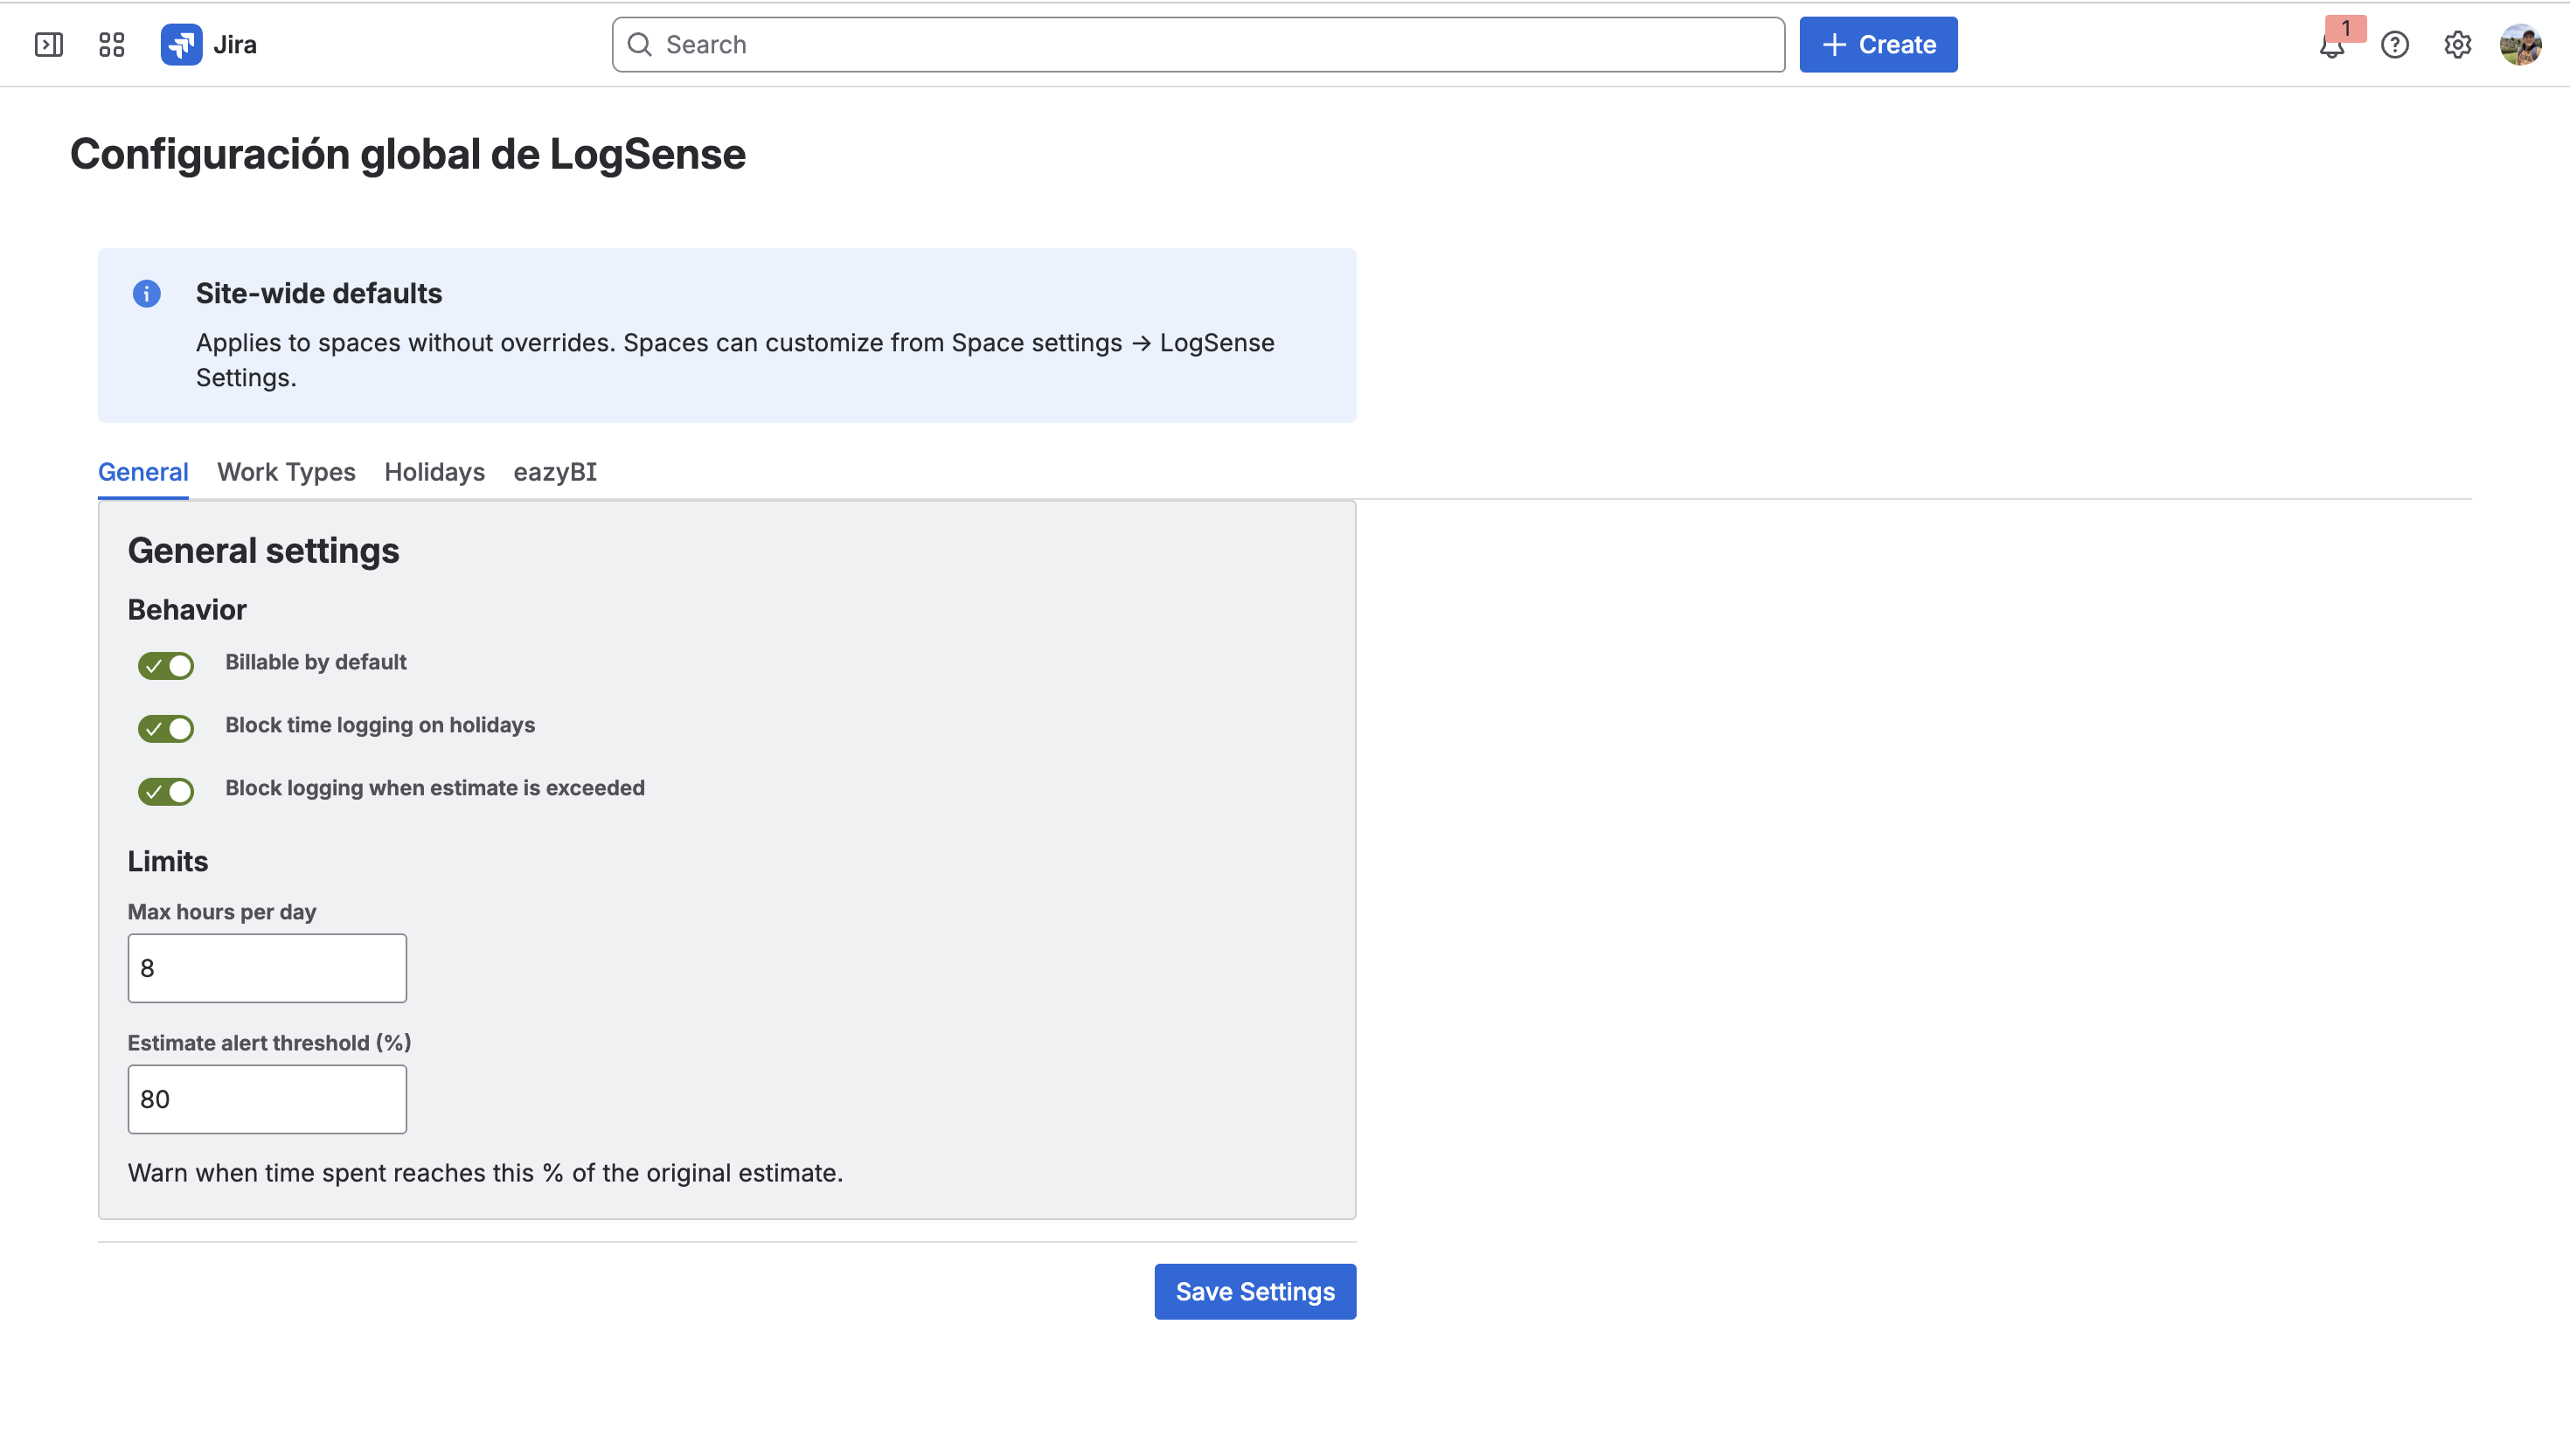
Shared components
The logging form reuses components in worklogShared.jsx for consistency across modal, Work log tab, and other surfaces.
Relationship with per-space LogSense Settings
Activating the provider does not replace per-space configuration. Each space must define in LogSense Settings:
- Daily hour limit
- Default billable value
- Work types
- Holiday calendar
Without this configuration, validations and defaults may not apply as expected.
Reverting to native tracking
To restore Jira's native experience:
- Settings → Work items → Time tracking.
- Select Jira (native) instead of LogSense.
- Save.
Preview
The jira:timeTrackingProvider module may be marked as Preview on the Forge platform. Check Atlassian's official documentation for current general availability status.