Installation Guide
Installing LogSense for Jira on your Jira Cloud instance is done via a direct Atlassian Forge installation link. After installation, you must activate LogSense as the time tracking provider to enable the full logging experience.
LogSense for Jira is not yet published on the Atlassian Marketplace. The current installation is done exclusively through the official developer link below.
Prerequisites
- Jira Administrator or Site Administrator permissions to install Forge apps.
- Internet connection and access to your instance (
your-domain.atlassian.net). - Time tracking enabled on the site (standard Jira requirement for logging work).
Direct installation link
Installation steps (Administrators)
- Sign in to Jira Cloud with administrator credentials.
- Open the direct installation link above.
- Select your Jira Cloud site if prompted.
- Review requested permissions (scopes) and confirm with Accept & install (or equivalent).
- Wait for Atlassian to complete the Forge app deployment.
- Verify under Apps → Manage apps that LogSense for Jira appears as installed.
The app requests read/write permissions over worklogs, spaces, issues, and configuration needed to validate daily limits, persist metadata in Forge KVS, and render the reporting gadget. All permissions follow Forge's least-privilege principle.
Not an Administrator?
If you don't have administrator privileges, share the installation link with your Jira administrator and request that LogSense for Jira be installed on the site. Optionally, add a message explaining why the app will benefit your team.
Time tracking provider activation (post-installation)
Installation alone does not replace Jira's native UI. To do so:
- Go to Settings (⚙️) → Work items → Time tracking.
- Under Time tracking provider, select LogSense.
- Save changes.
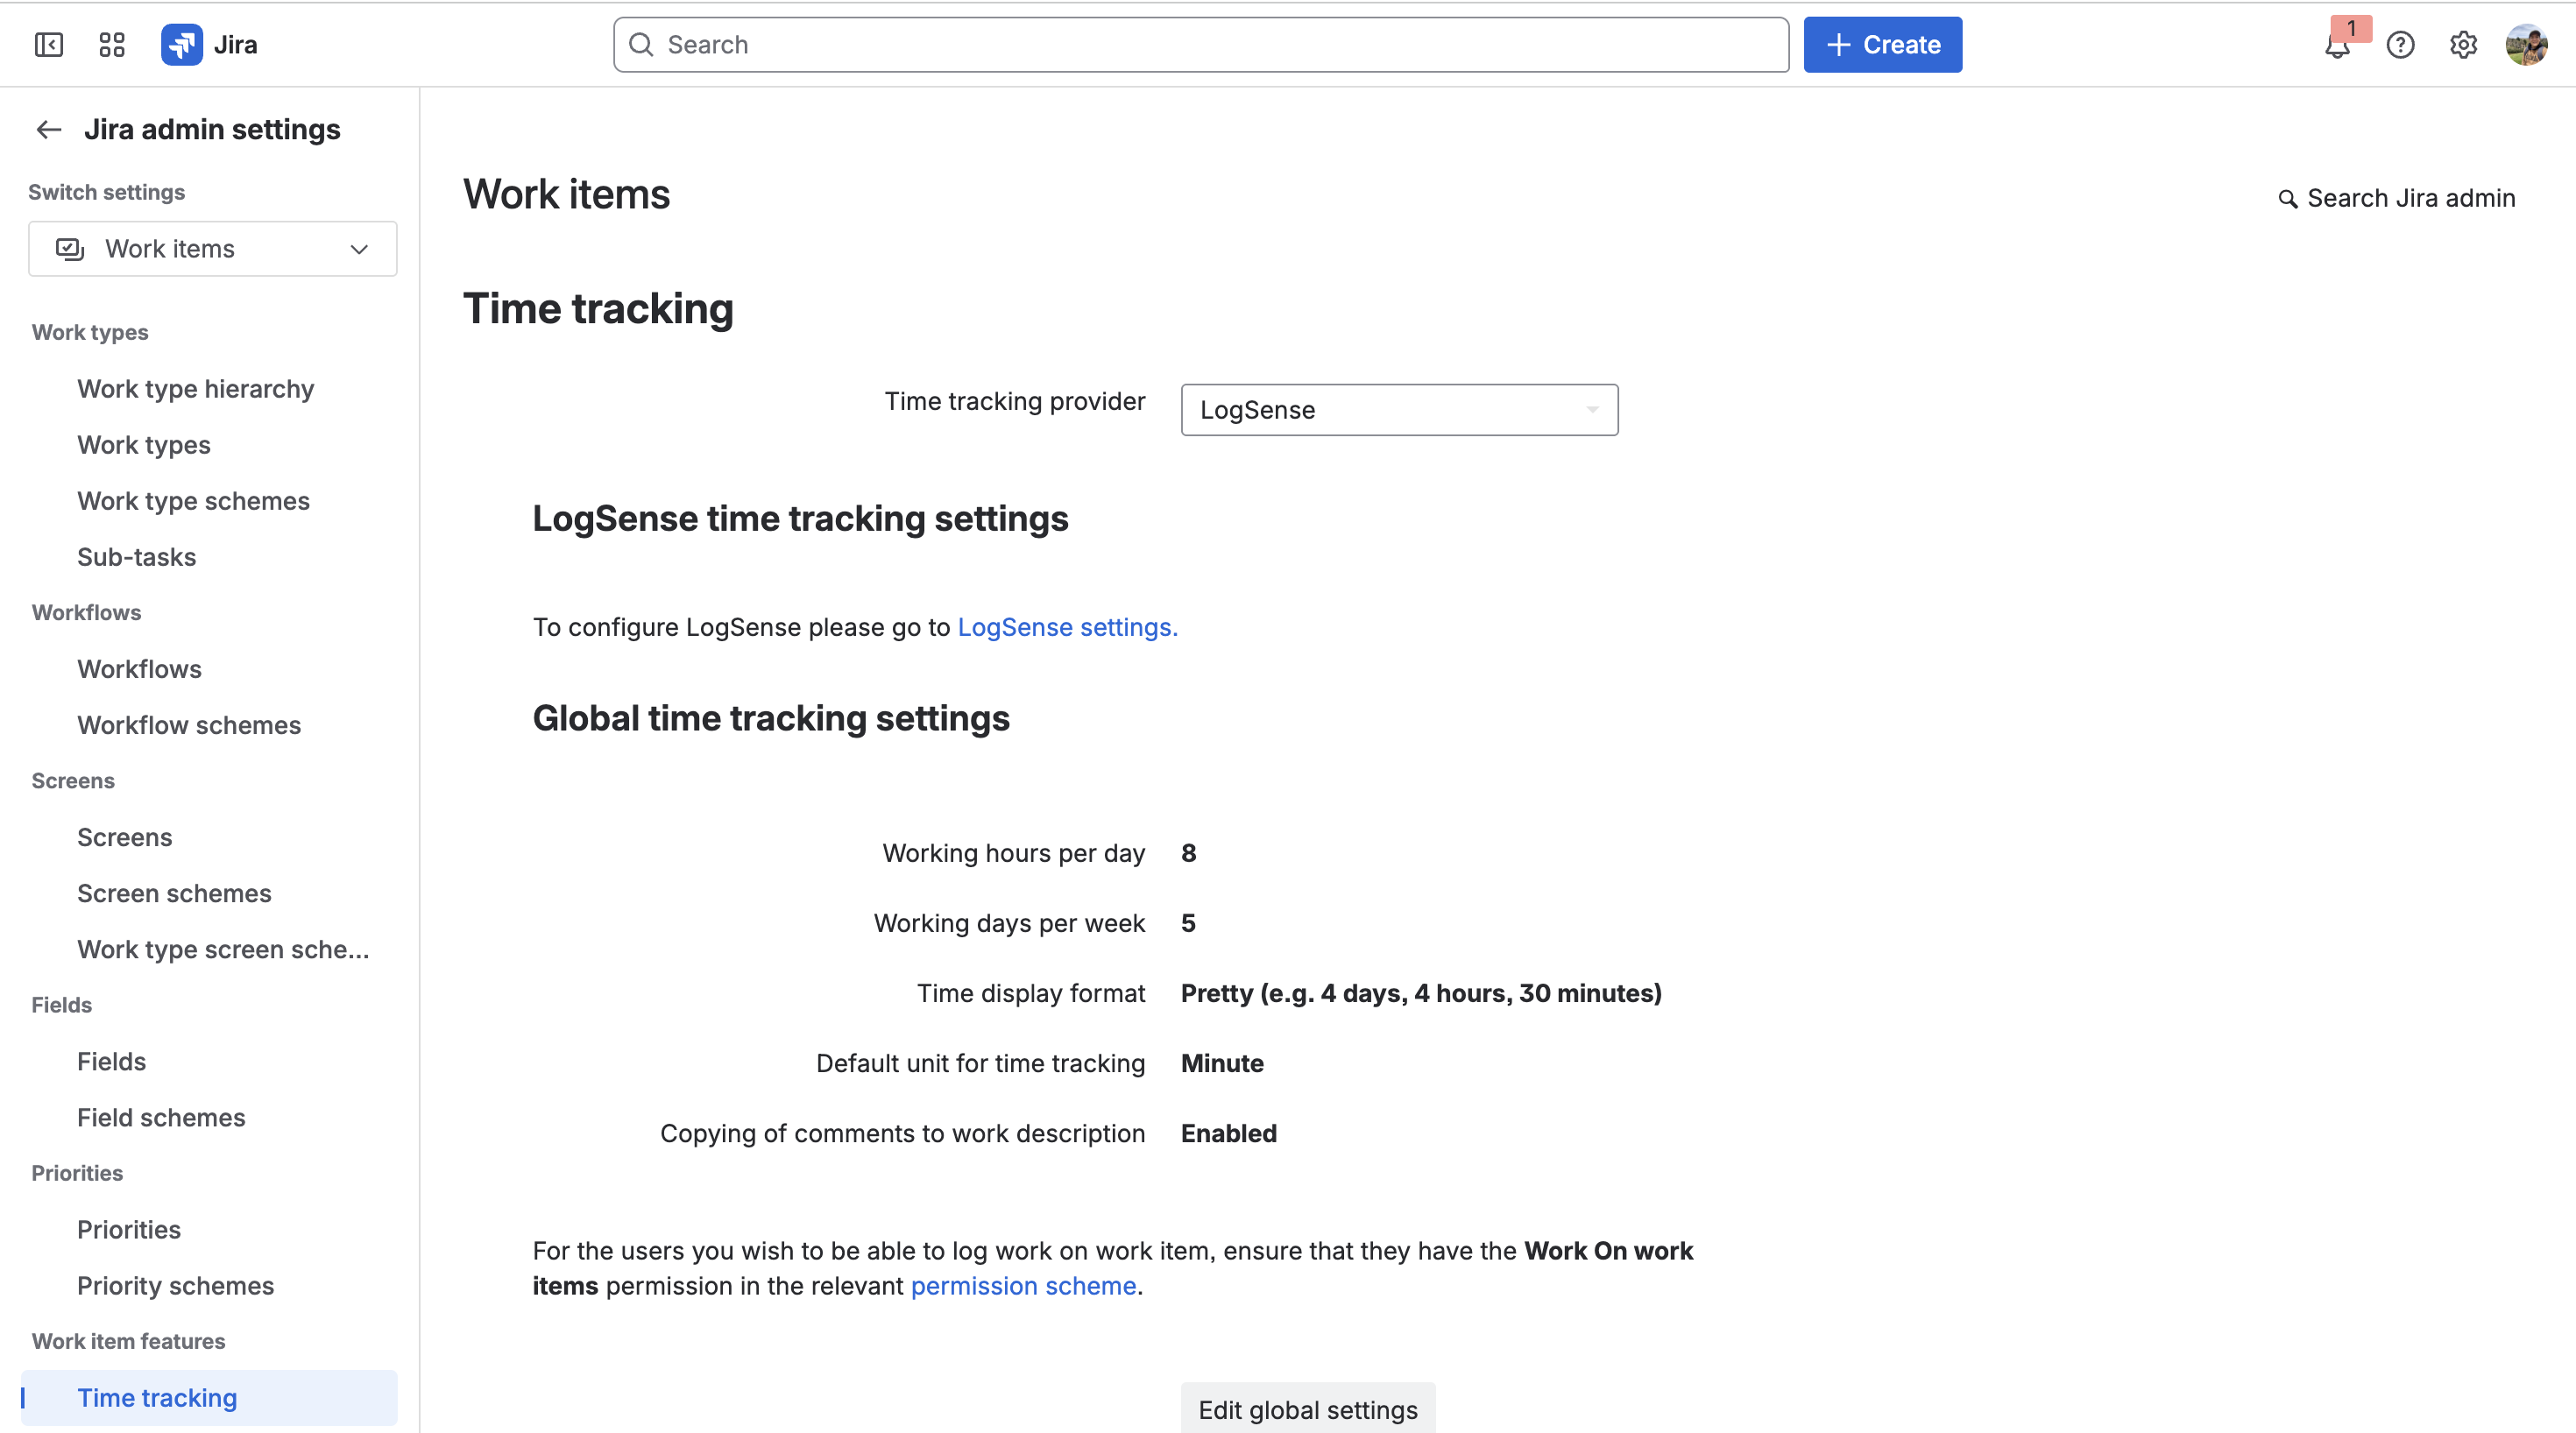
- Jira's native Log work UI disappears.
- Time logging goes through LogSense modules: Log work modal, Work log tab, and provider configuration.
Step-by-step details in Time tracking provider activation.
Per-space configuration
For each space using LogSense:
- Open the space in Jira.
- Open Space settings and go to LogSense Settings.
- Configure General, Work Types, and Holidays according to team rules.
See the Administrator Guide for each tab.
Hours report
After installation, the Hours report (Hours logged page) is available in Apps → LogSense. You do not need to add a gadget or build a dashboard to use it. See Hours report and timesheet.
Reporting gadget (optional)
- Edit a Jira dashboard.
- Add gadget → search for the LogSense billable hours gadget.
- Configure filters and save.
See Reporting gadget.
Automatic updates (Forge)
Forge apps are updated from Atlassian infrastructure. If a version introduces new scopes, Atlassian will request your approval before applying it.