How to Merge Files
The Merging functionality allows you to consolidate multiple attachments into a single PDF file quickly and orderly.
1. Access the Work Desk
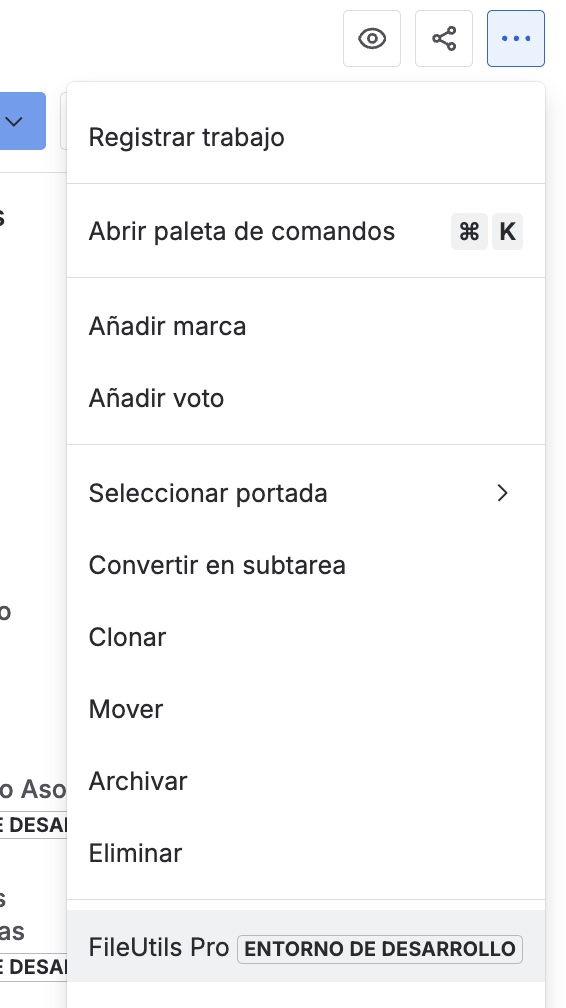
To open FileUtils Pro, navigate to any Jira Work Item that contains attachments.
- Click on the More actions menu (the three dots
...) in the upper right corner of the work item. - Select FileUtils Pro from the dropdown menu.
2. Explore the Work Desk
When the modal opens, you will see three tabs: Merge, Convert, and Compress.
- Merge Tab: Allows you to combine multiple PDF files and images into a single PDF document.
- Convert Tab: Allows you to transform individual Word, Excel, or image files to PDF format.
- Compress Tab: This option is visible in the interface as part of our roadmap, but it is currently disabled. It will be available in future updates.
The FileUtils Pro interface automatically detects your Jira configuration and adapts to both Light Theme and Dark Theme, ensuring you always work with the best visibility.
3. First Use
If the ticket does not have compatible attachments or the staging area is empty, you will see a guidance screen to help you on your first use.
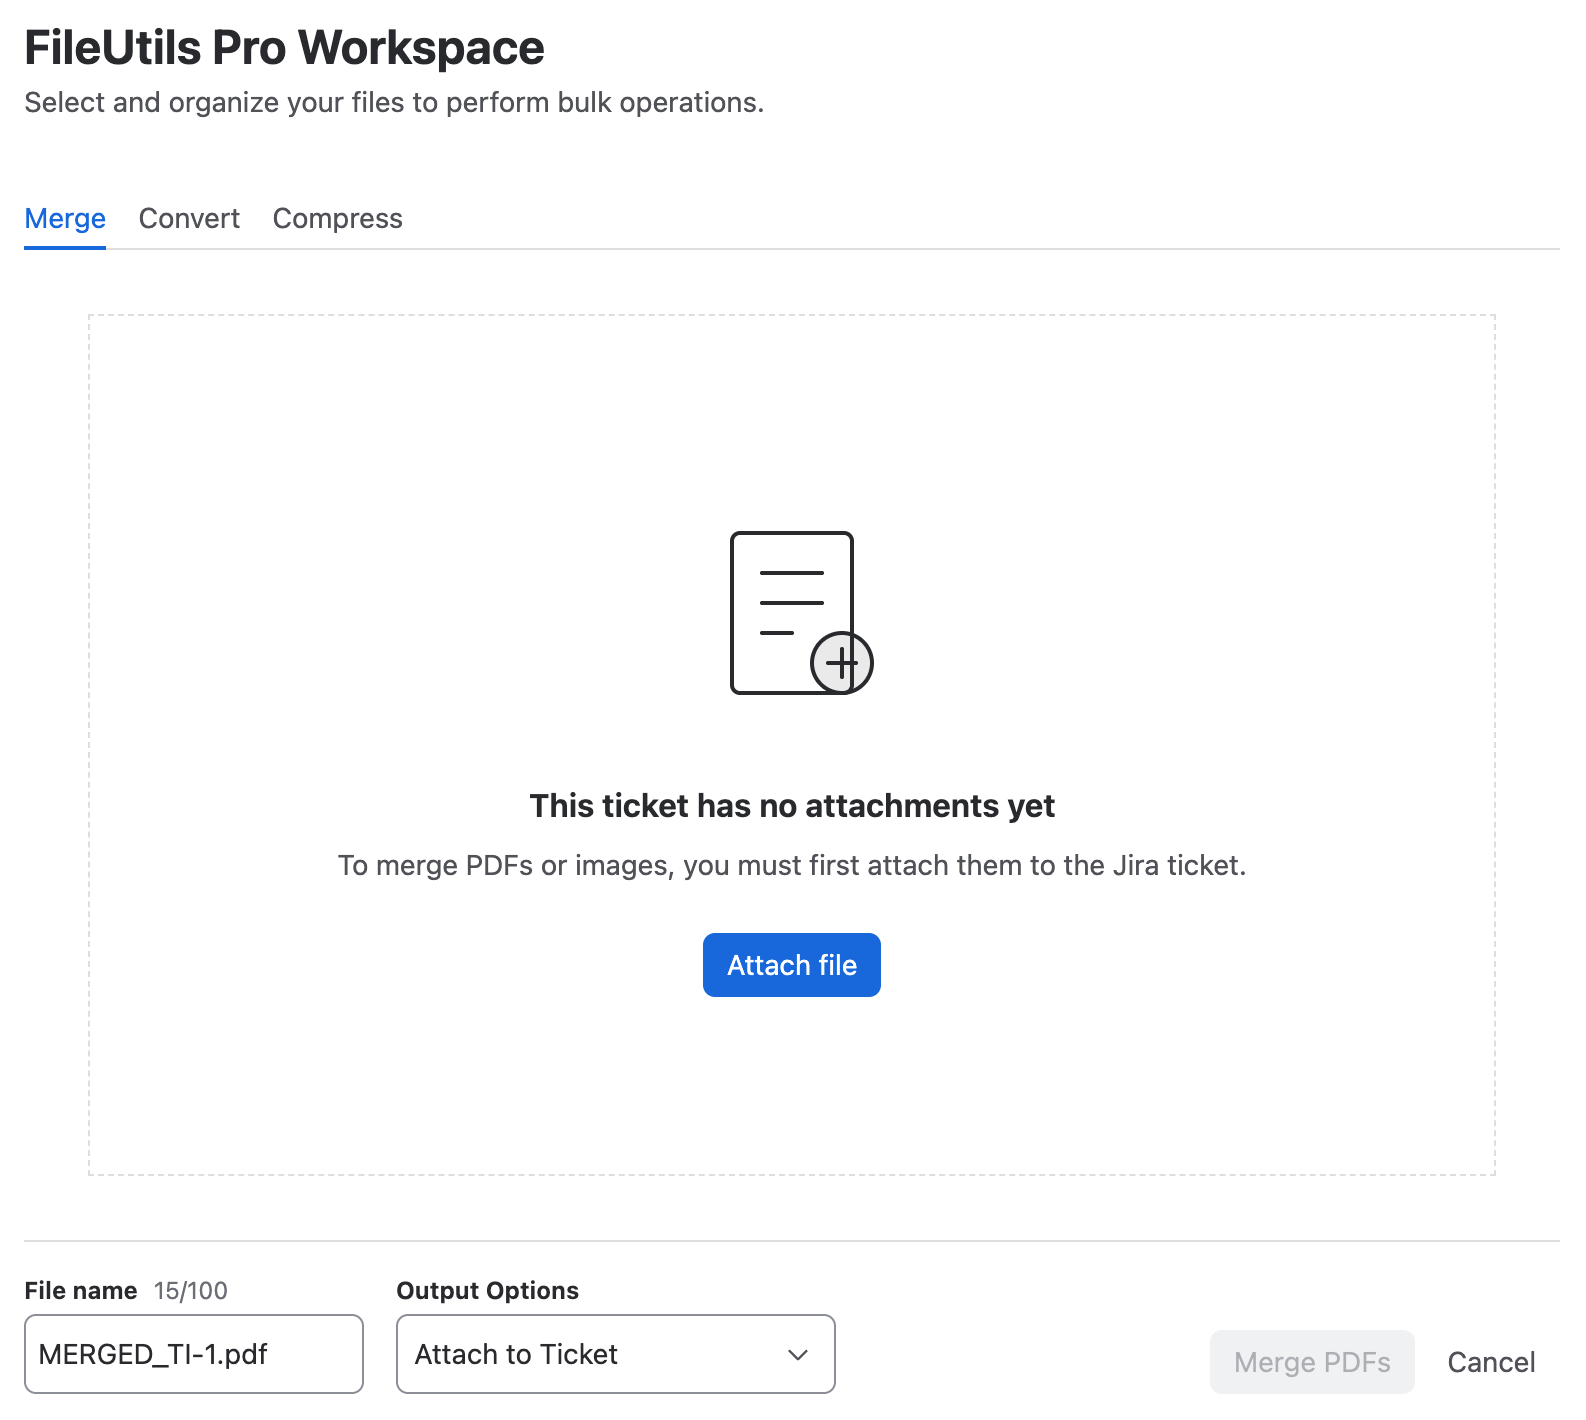
This screen includes:
- Contextual message: Informs you that there are no files available to process in this tab yet.
- Attach file button: Opens Jira's native dialog to add files directly to the ticket without leaving the work desk.
- Merge button disabled: The action button remains disabled while there are no files in the staging area.
To enable the Merge button, you need to move at least 2 files to the staging area.
4. Compatible Attachments Management
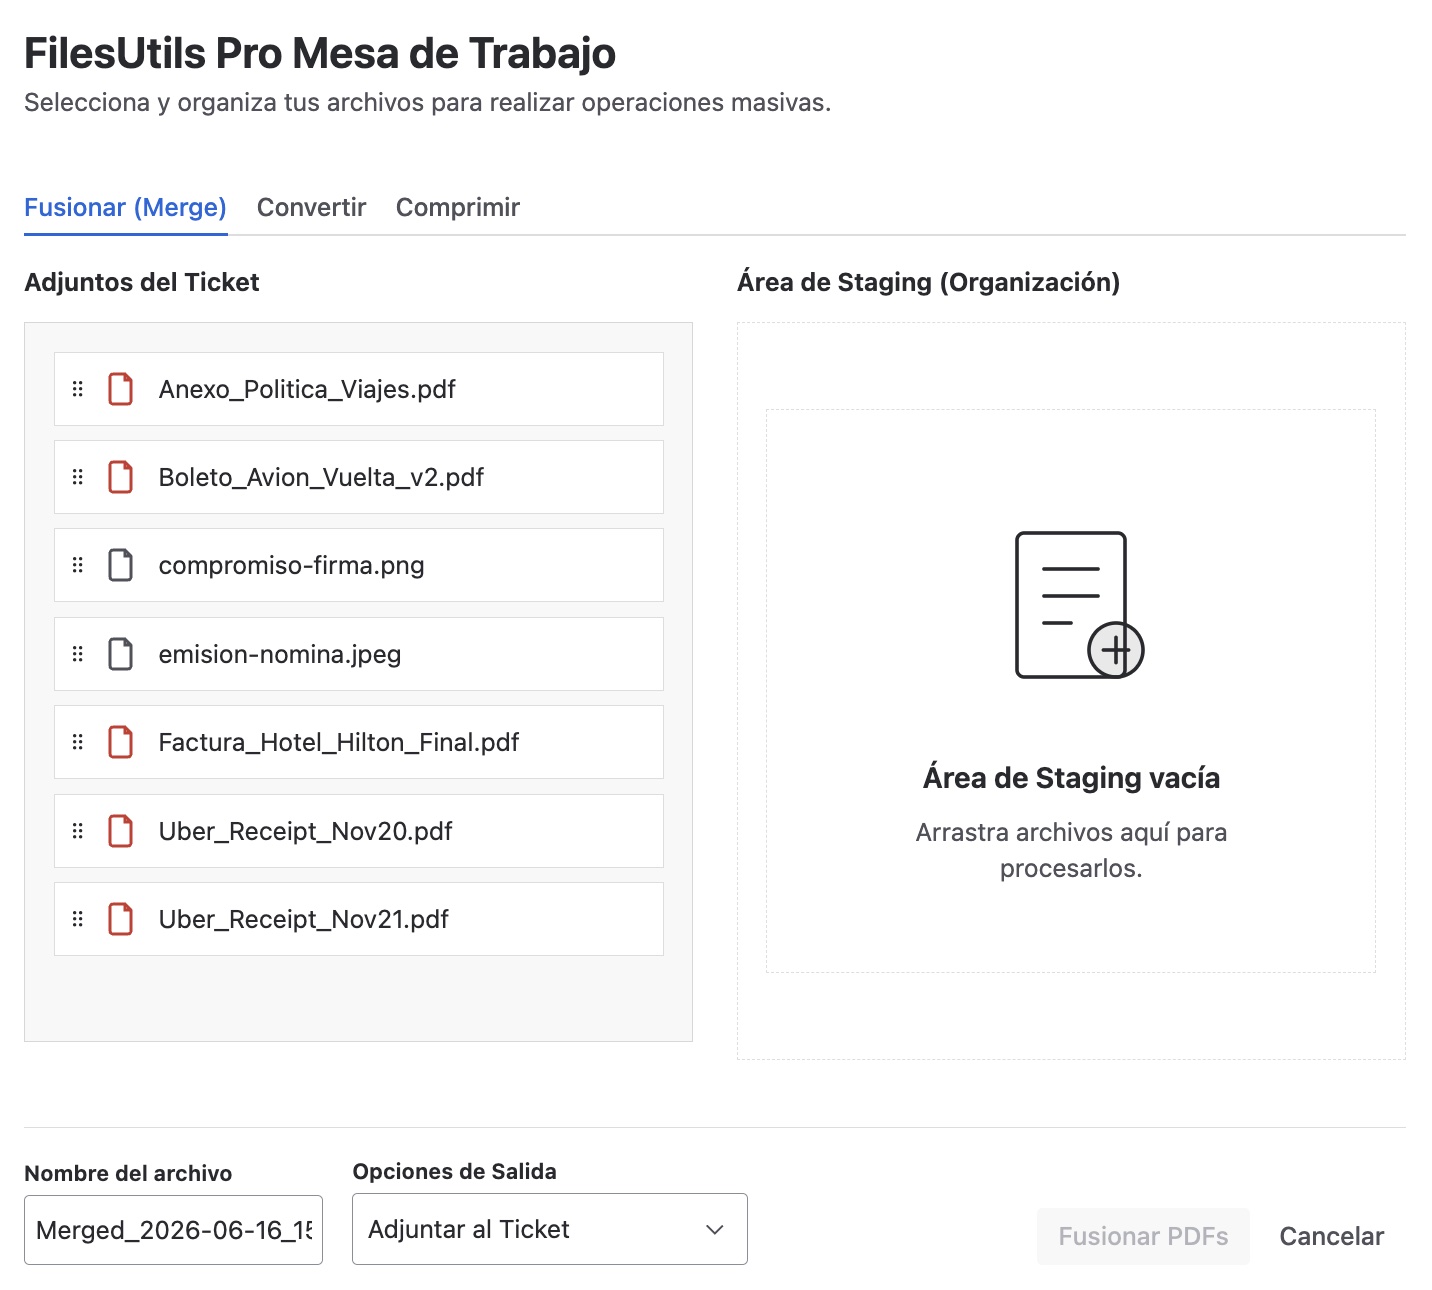
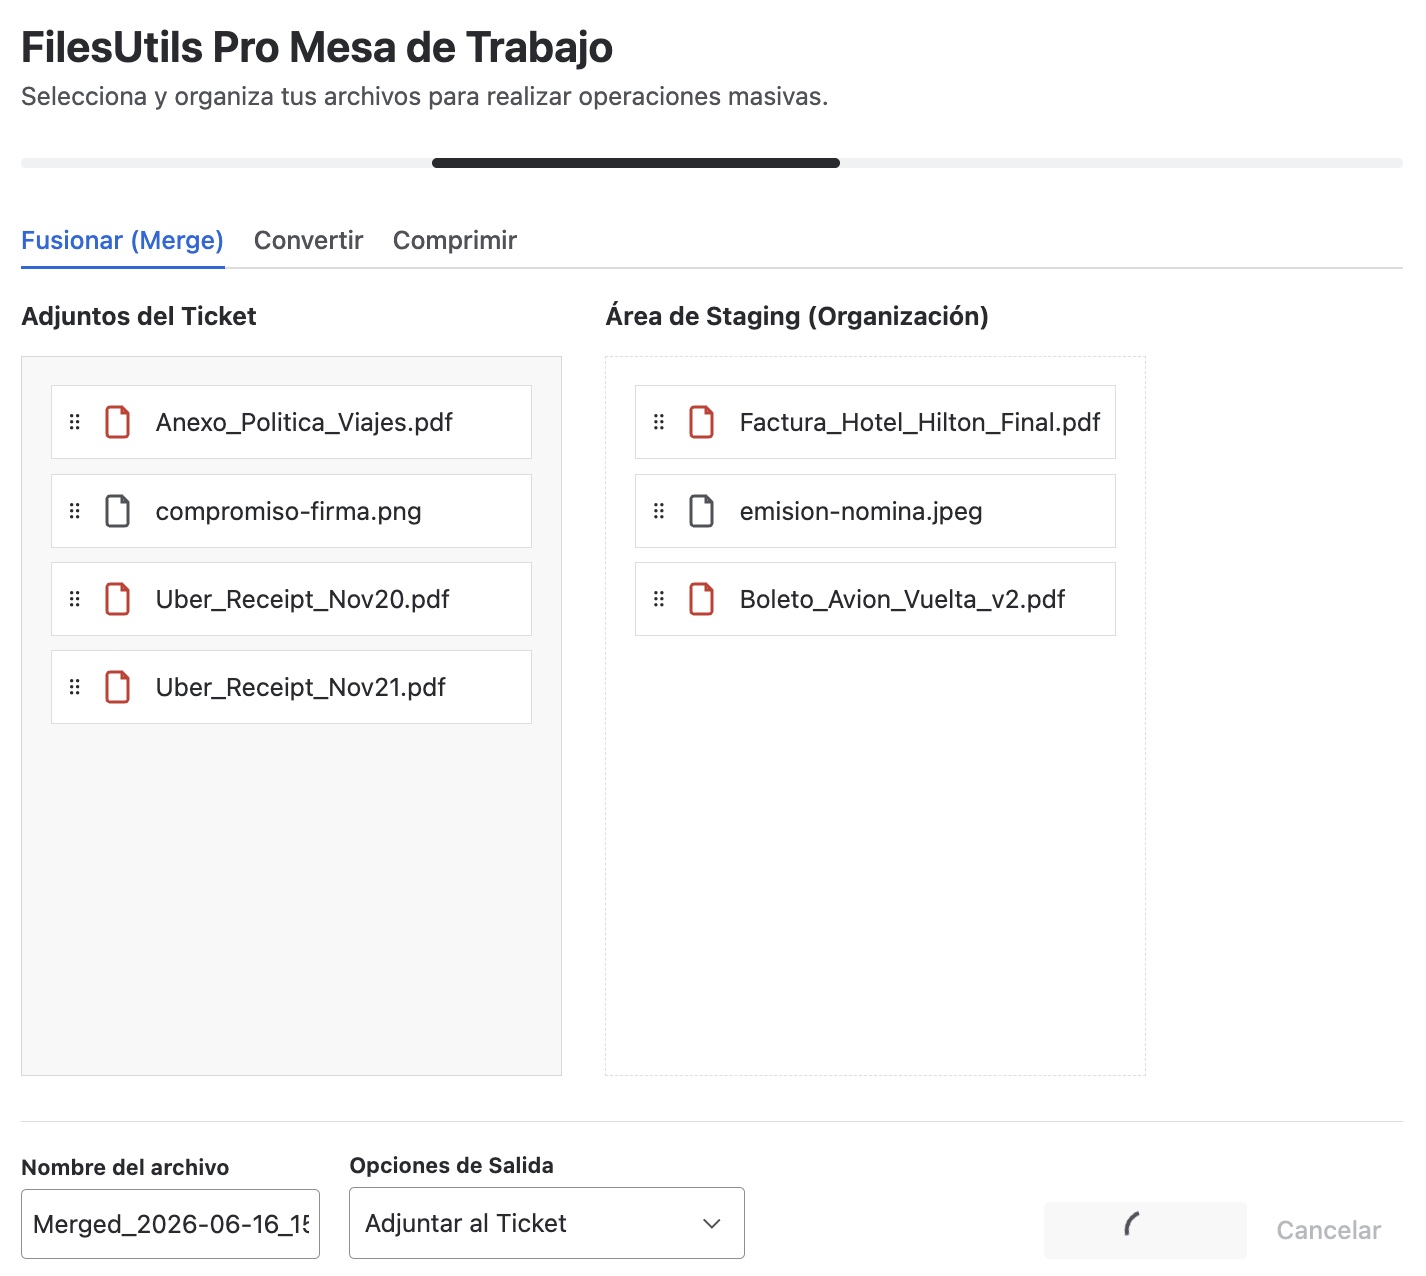
When the work item already has compatible files, the interface is divided into two main columns:
- Attachments Column (Left): Shows all compatible files present in the work item.
- PDFs: Identified with a file icon with a red frame.
- Images: Supports
.jpg,.pngand.jpeg.
- Staging Column (Right): The preparation area where you will place the files you want to process.
5. Prepare the Merge
- Select Files: Drag files from the left column to the Staging column.
- Order: Once in Staging, you can reorder the files by dragging them up or down. The order in this list defines the page order in the final PDF.
- Image Conversion: If you include images, FileUtils Pro will automatically convert them into a PDF page during the merging process.
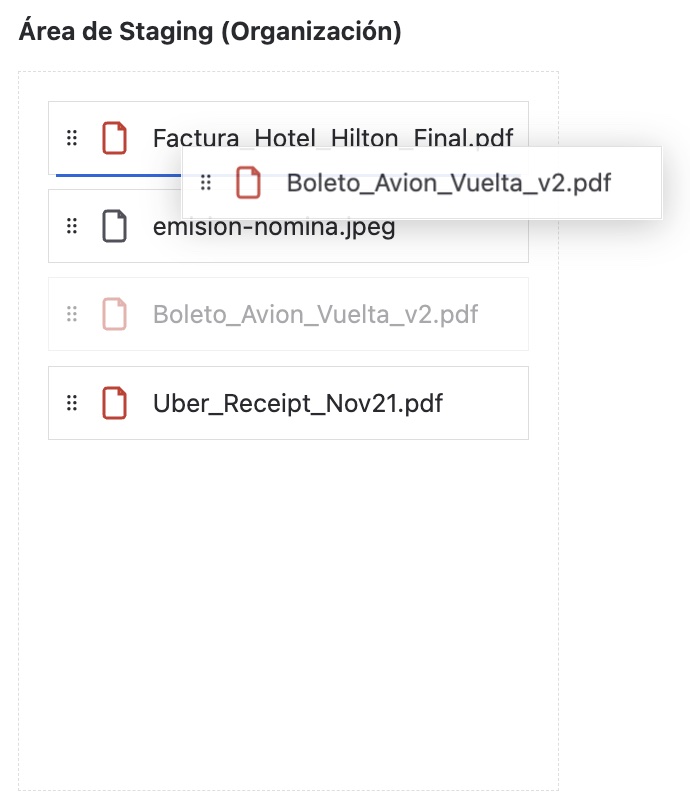
You need at least 2 files in the Staging column to enable the Merge button.
6. Configure the Result
In the footer of the modal, you can define how the resulting file will behave:
- File Name: By default,
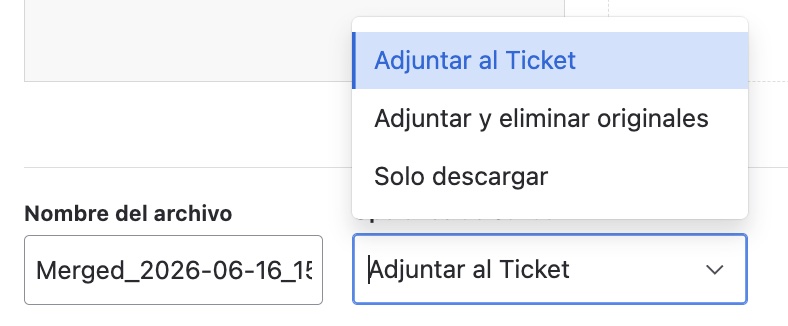
Merged_YYYY-MM-DD_HHmmis suggested. You can edit it in the text field. - Post-Action: Select one of the three options from the selector:
- Attach to ticket: The new file is saved as an attachment in the work item.
- Attach and delete originals: Saves the new file and deletes the files you used for the merge (ideal for keeping the work item clean).
- Download only: Generates the file and downloads it to your computer without saving it in Jira.
7. Execute the Merge
Once everything is configured, click the Merge button. During the process, you will notice the following indicators in the interface:
- Processing line: An animated line will appear at the top of the work desk indicating that the merge is in progress.
- Button state: The Merge button will be temporarily disabled and show a loading icon (spinner) until the operation is complete.
8. System Notifications
After the process finishes, the system will show flag notifications to inform you of the result:
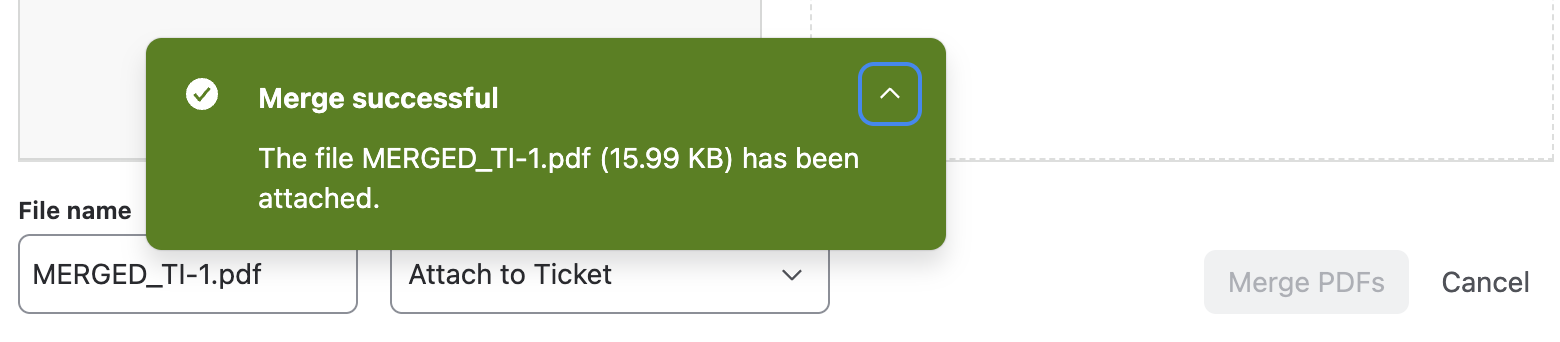
- Success message: You will see a success flag confirming that the merge completed correctly. This message closes automatically.
- Download message: If you selected the "Download only" option, you will see a success flag indicating that the download has started. This message also closes automatically.

Notification Behavior
- Flag types:
- Success (green): Operation completed successfully, including download start.
- Information (blue): Informational messages, such as the skipped files notice.
- Error (red): Processing failures. Require manual closure.
- Auto-close: Success and information flags close automatically after a few seconds.
- Manual close: Error flags must be closed manually by the user.
- Notification queue: The system can display up to 3 simultaneous notifications. If the limit is reached, new notifications will wait their turn.
If files were skipped during the merge (for example, incompatible formats), you will see an information flag indicating which ones. This notice will not repeat after completing the operation.
9. Verify the Result
After the process finishes, the work desk will show a visual confirmation of the operation:
- File details: The message will include the final name of the generated file and its size (indicated in KB, MB, etc.), confirming that the process was completed correctly.