How to Convert Files
The Conversion feature allows you to transform individual files in Word, Excel, or images (.jpg, .png, .jpeg) to PDF format quickly and easily.
Currently, conversion is only supported in one direction: Word/Excel/Image ➔ PDF. Reverse conversion (from PDF to Word, Excel, or image) is not supported.
1. Initial Configuration (API Key)
To perform the conversion of Word and Excel files, FileUtils Pro integrates with the external provider Cloud Convert. The first time you access this feature, a modal will open requesting an API Key to authorize the service.
Follow these steps to obtain and register your API Key:
- Create a Cloud Convert account: If you don't have an account yet, sign up at Cloud Convert Register. You can use the free account (which offers a daily conversion limit) or purchase a paid plan if you need more capacity.
- Generate your API Key: Once logged into your account, directly access the credentials section at Cloud Convert API Keys to create and copy your API key.
- Register the API Key in FileUtils Pro: Paste the copied key into the text field of the initial configuration modal within the application and click save.
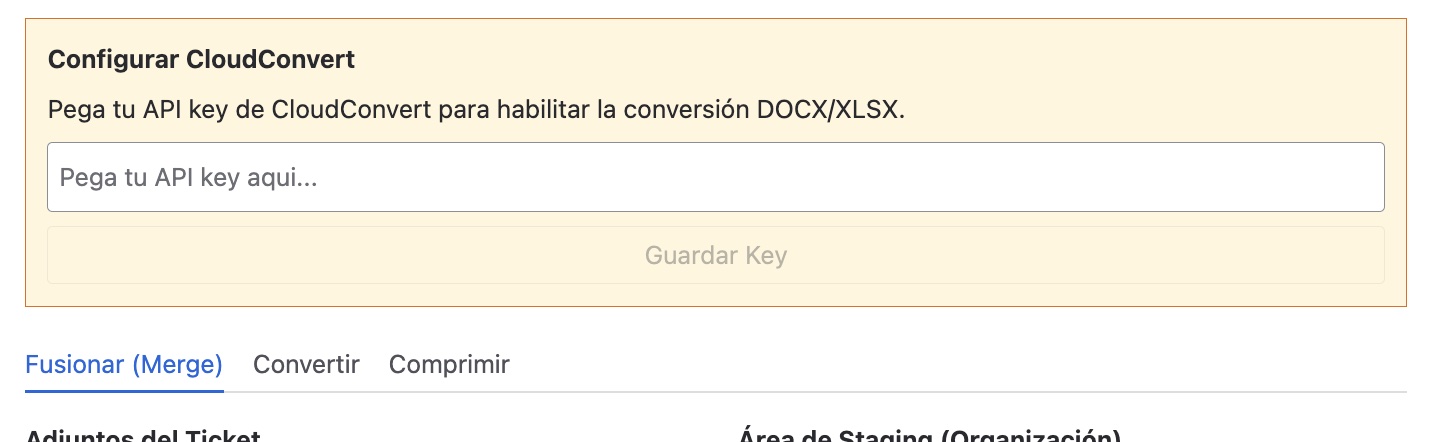
Once saved, this API Key will be securely stored and automatically used for all merge and conversion processes that require the Cloud Convert API.
For image file conversion to PDF, the Cloud Convert API is not consumed. Instead, the plugin uses the internal image merging library, which performs the conversion locally, seamlessly, and at no external cost.
2. First Use
If the ticket does not have compatible attachments to convert or the staging area is empty, you will see a guidance screen to help you on your first use.
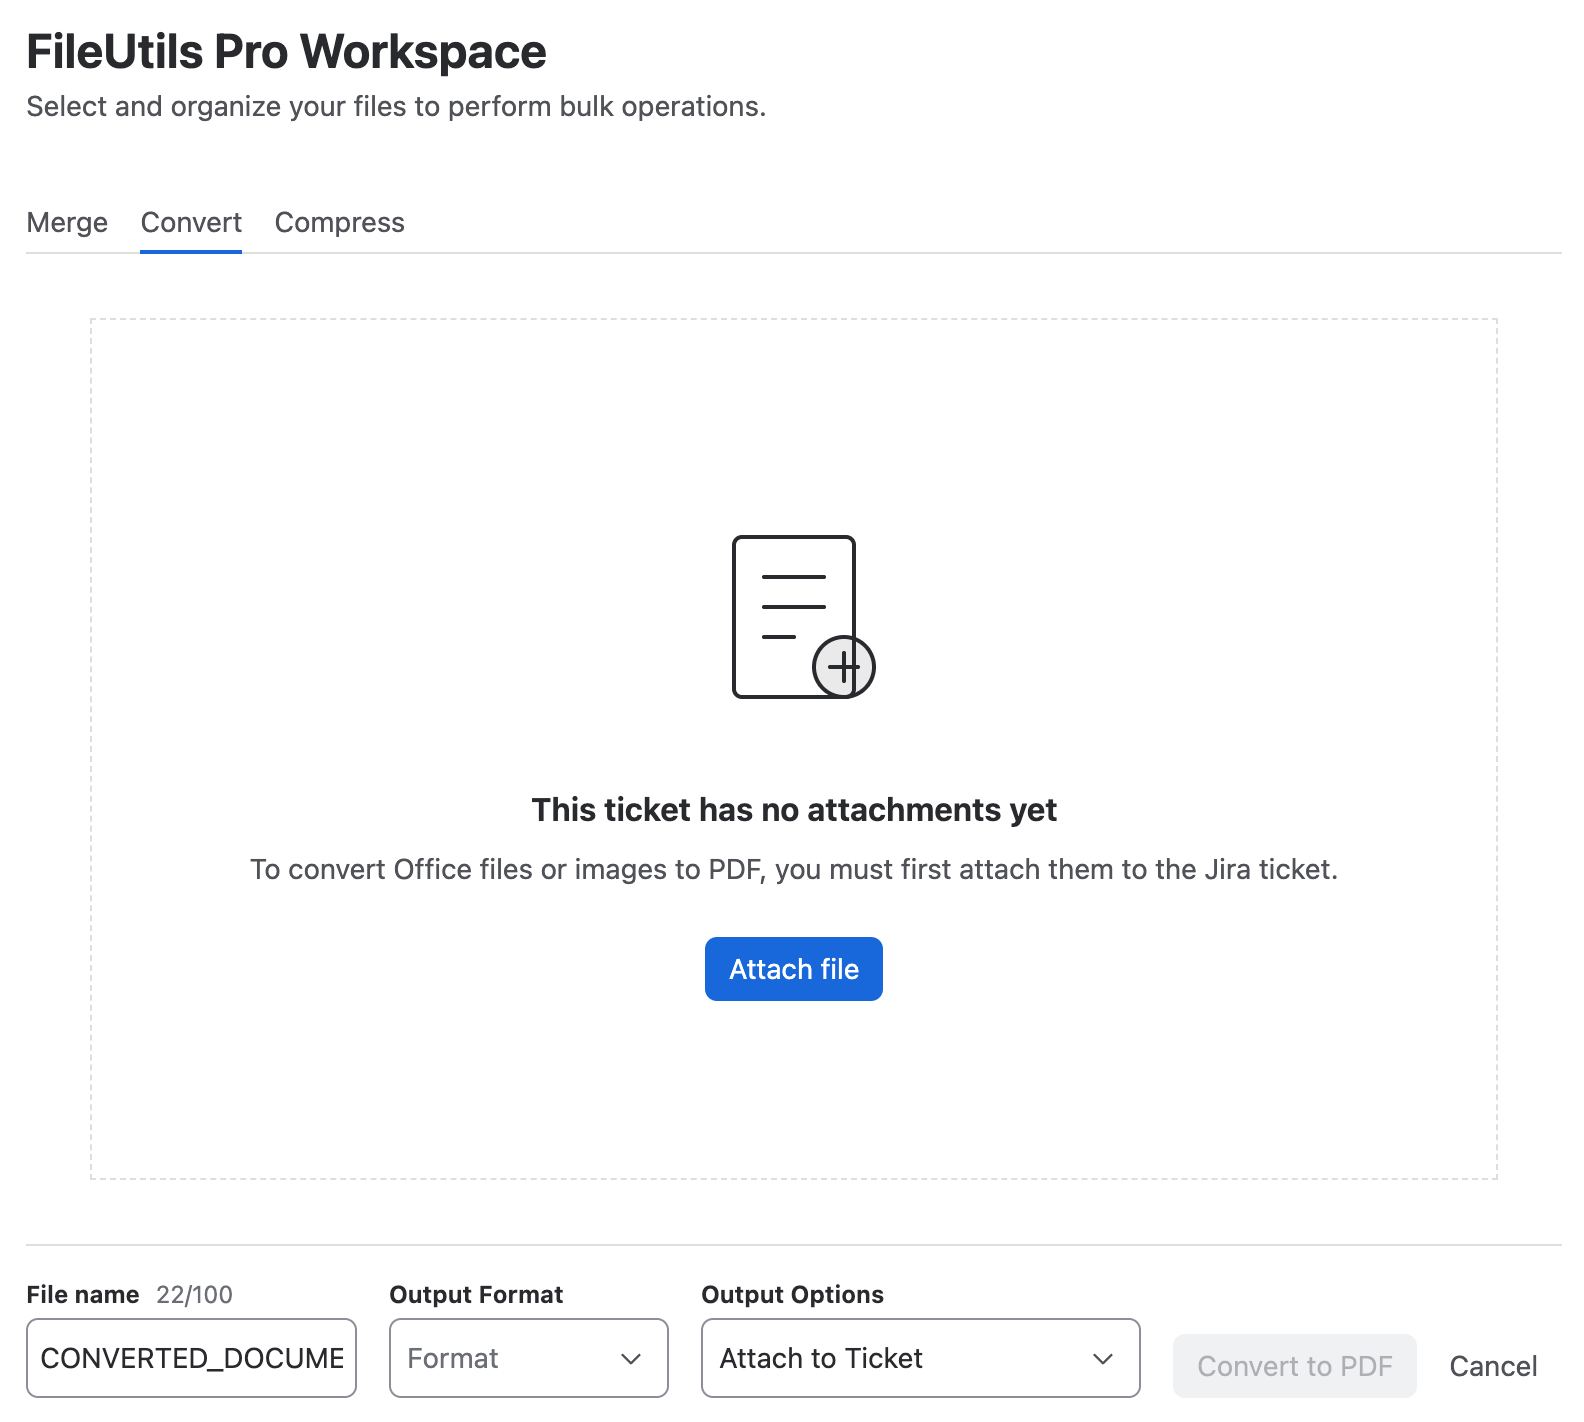
This screen includes:
- Contextual message: Informs you that there are no compatible files to convert in this tab yet.
- Attach file button: Opens Jira's native dialog to add files directly to the ticket without leaving the work desk.
- Convert button disabled: The action button remains disabled while there are no files in the staging area.
To enable the Convert button, you need to move at least 1 file to the staging area.
3. Compatible Files List
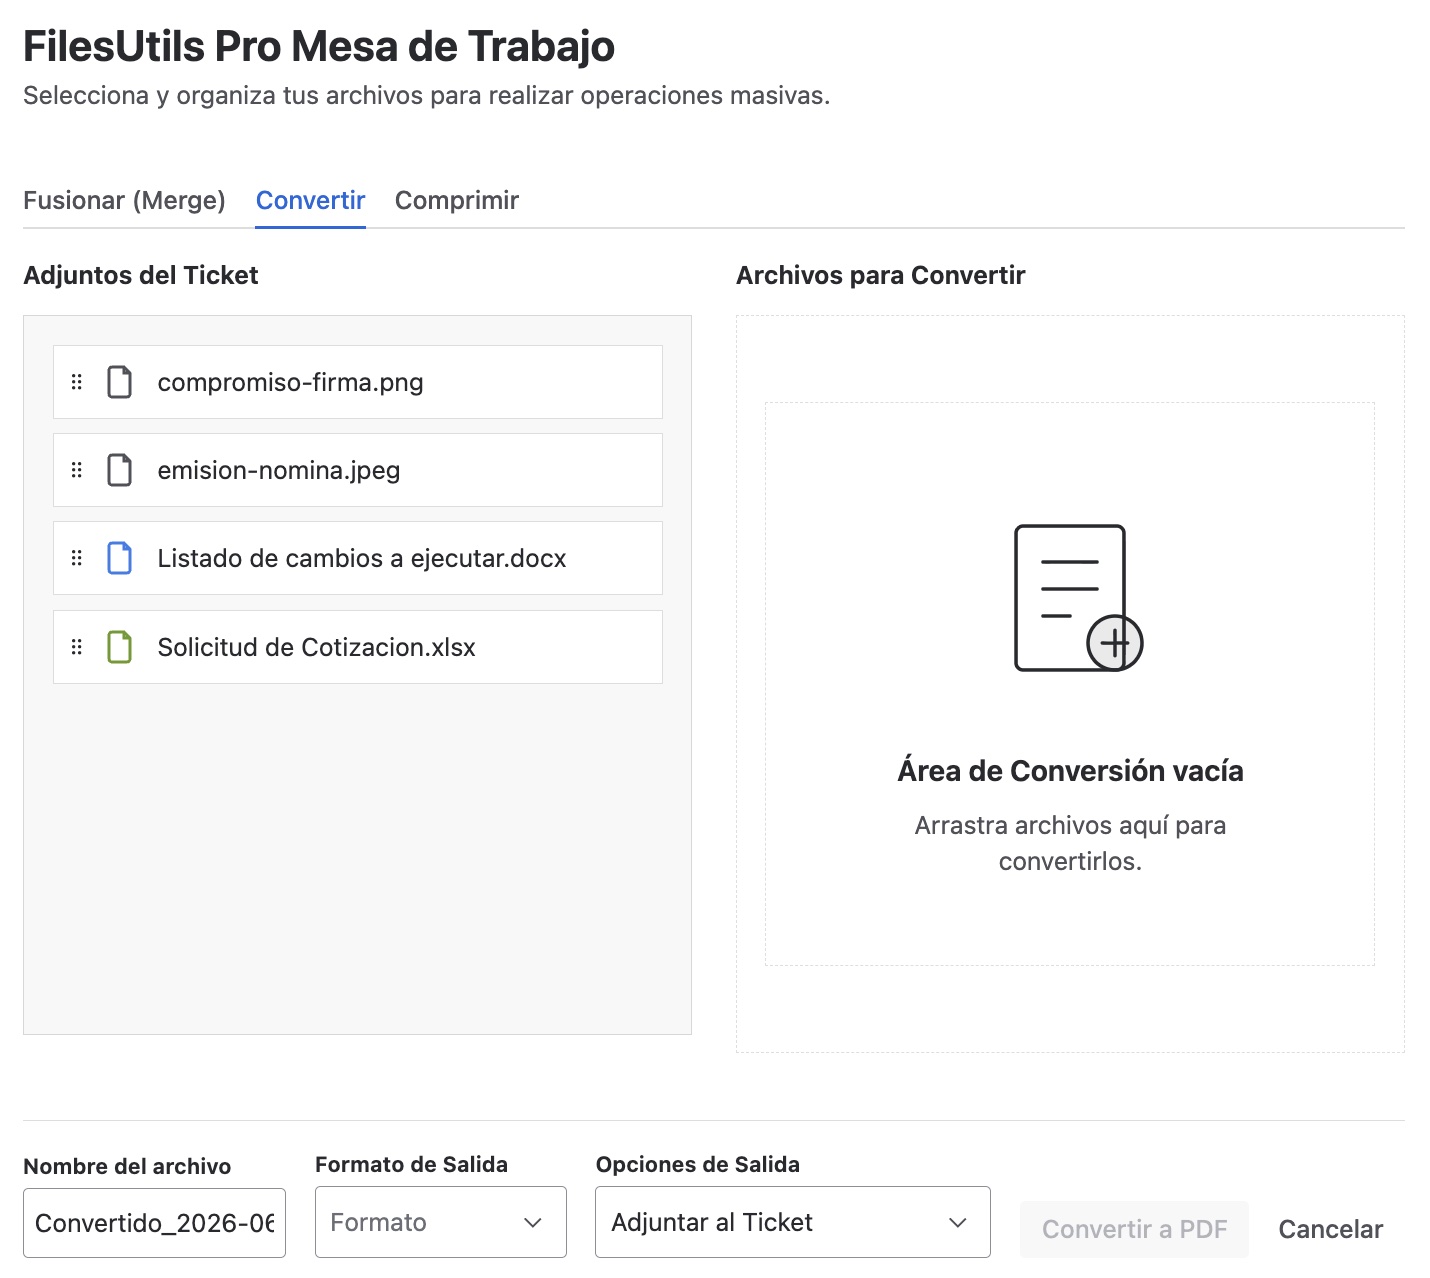
When selecting the Convert tab, the left column will show only the ticket attachments with formats compatible for conversion:
- Word Documents:
.doc,.docx - Excel Workbooks:
.xls,.xlsx - Images:
.jpg,.png,.jpeg
4. Prepare the Conversion
- Move to Staging: Drag or add the desired files to the preparation (Staging) column on the right.
- Multiple selection: It is possible to select and process up to a maximum of 3 files simultaneously.
You can process up to 3 files at the same time in the conversion tab.
5. Configure the Result
In the footer of the conversion modal, you can define the output parameters for the generated files:
- Output file name: The behavior varies depending on the number of files selected:
- Single file: The text field in the footer will auto-complete with the original attachment name replacing its extension with
.pdf, allowing you to freely modify it. - Multiple files: If processing more than one file at a time, individual name editing will be disabled and the explanatory message will be shown in the footer:
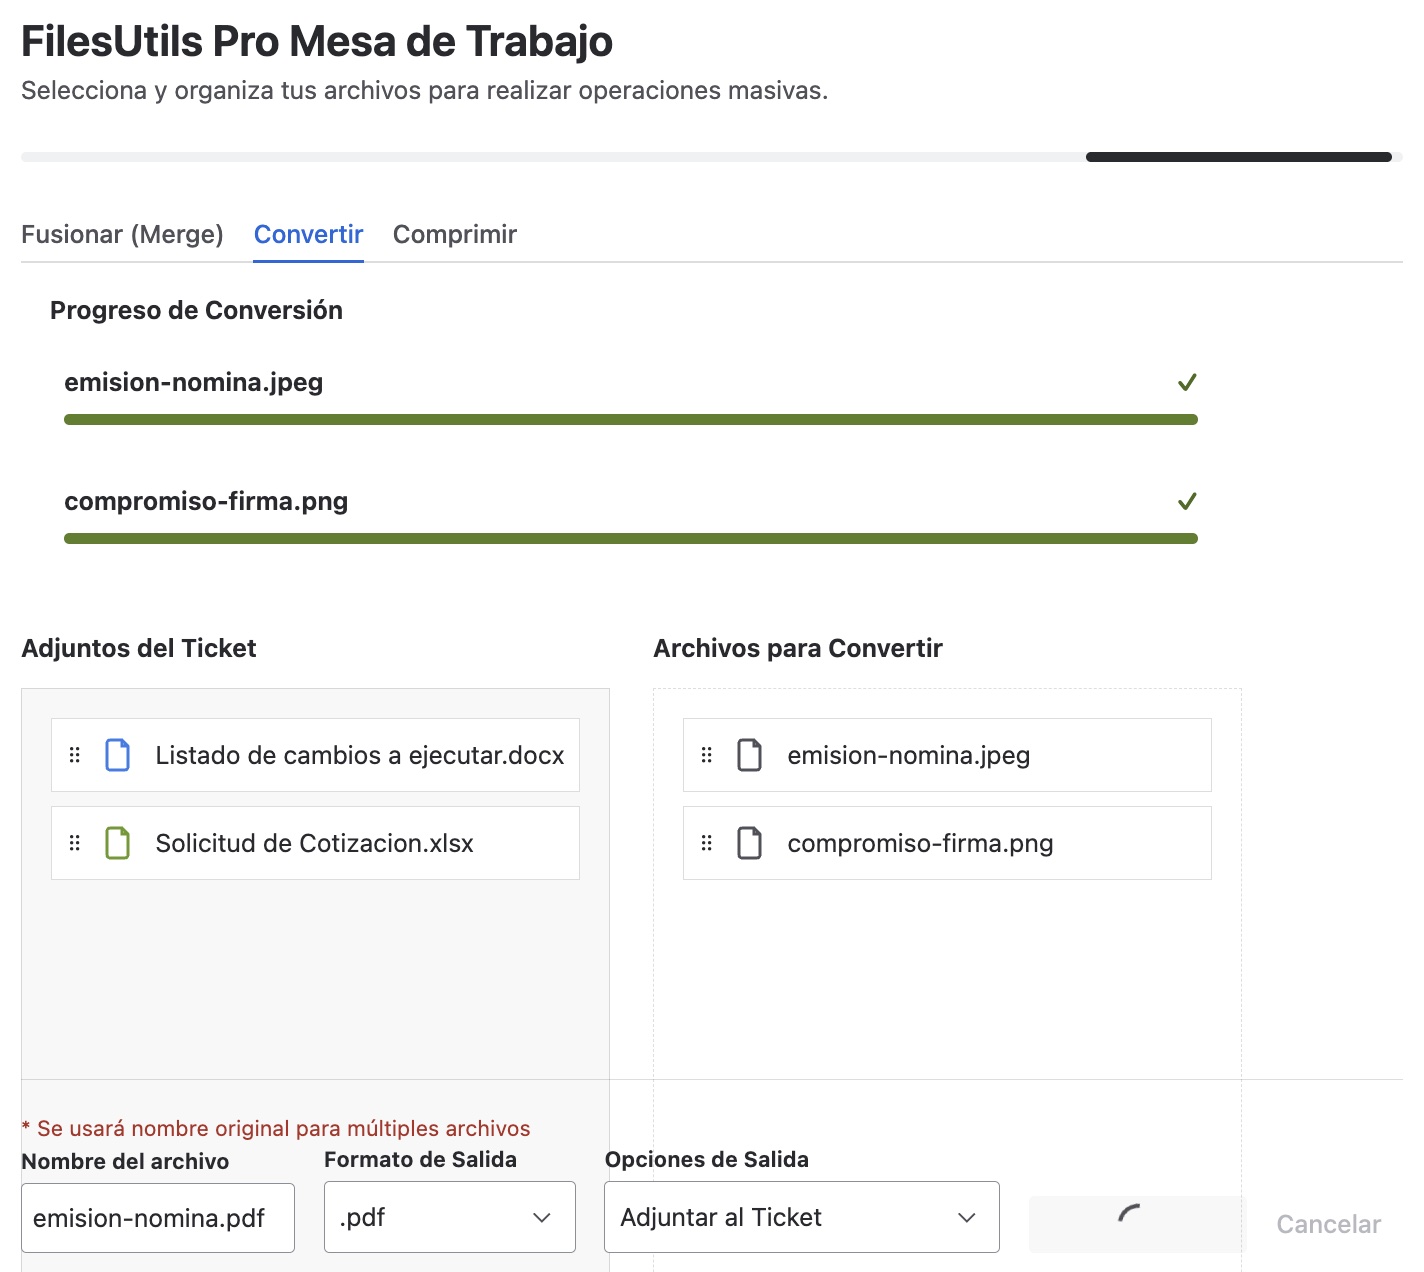
* Original name will be used for multiple files. In this case, each resulting file will keep its original name with the respective.pdfextension.
- Single file: The text field in the footer will auto-complete with the original attachment name replacing its extension with
- Output format: Currently, only the PDF output option is available.
- Destination options (Post-Action): Define the behavior of the resulting file:
- Attach to ticket: The new PDF files will be saved directly to the work item.
- Attach and delete originals: Saves the PDF files to the ticket and permanently deletes the source files (Word, Excel, or images).
- Download only: Downloads the files directly to the user's browser without storing them in Jira.

6. Execute the Conversion
Once the options are configured, click the Convert button. During the process, the following indicators will appear:
- Security lock: The conversion button will be disabled immediately to prevent double clicks and protect the processing state.
- Individual progress bars: Each file in the queue will show its own real-time loading bar to indicate its individual conversion progress.
7. System Notifications
After the process finishes, the system will show flag notifications to inform you of the result:
- Success message: You will see a success flag confirming that the conversion completed correctly. This message closes automatically.
- Download message: If you selected "Download only", you will see a success flag indicating that the download has started. This message also closes automatically.

Notification Behavior
- Flag types:
- Success (green): Operation completed successfully, including download start.
- Information (blue): Additional informational messages during the process.
- Error (red): Processing failures. Require manual closure.
- Auto-close: Success and information flags close automatically after a few seconds.
- Manual close: Error flags must be closed manually by the user.
- Notification queue: The system can display up to 3 simultaneous notifications. If the limit is reached, new notifications will wait their turn.
8. Verify the Result
Once all ongoing conversions have finished satisfactorily, the system will unlock the panel and display a success message indicating that the process has concluded correctly.
- File details: The message will include the final name of the generated file and its size (indicated in KB, MB, etc.), confirming that the process was completed correctly.