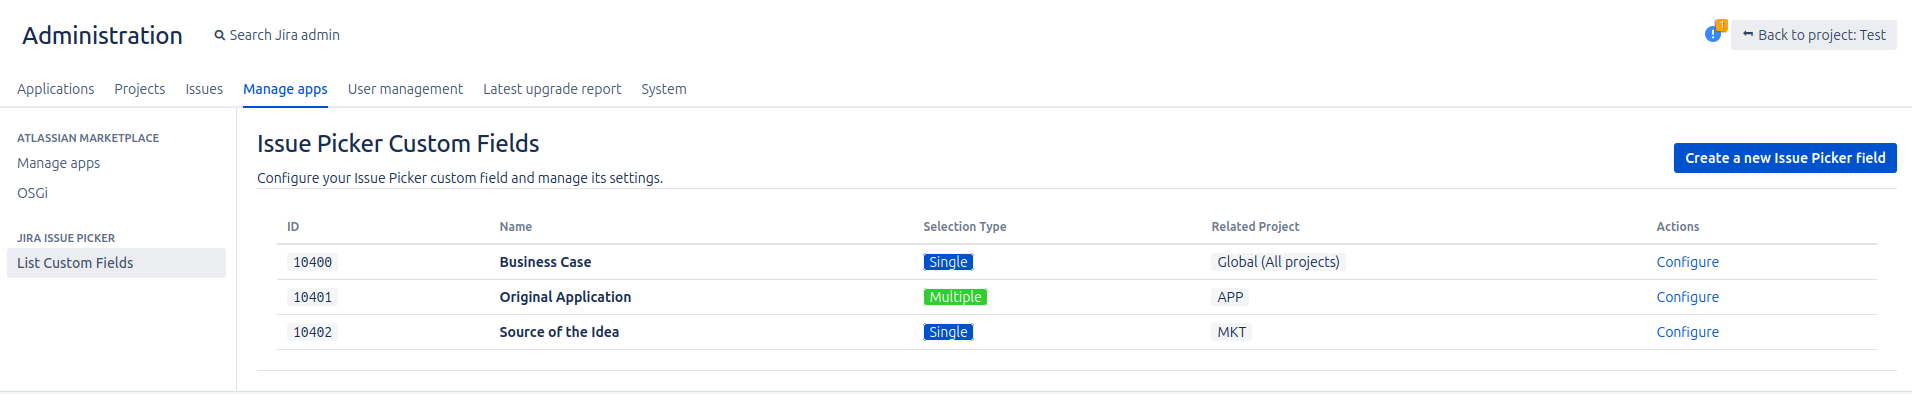
The Main Administration Panel
The Jira Issue Picker add-on includes a centralized panel where you can view and manage all the Issue Picker fields you have created.
How to Access the Panel
- Navigate to Jira Administration > Manage apps.
- In the left sidebar, you will see a new section titled Issue Picker. Click on it to open the panel.
Understanding the Panel
The panel displays a table with every custom field of the "Jira Issue Picker" type in your Jira instance. If you haven't created any yet, you will see a message guiding you to do so.
The table provides the following information for each field:
- ID: The unique identifier of the custom field. You can click it to easily copy the ID to your clipboard.
- Name: The name you gave to the custom field.
- Selection Type: Shows the field's selection mode: Single (blue) or Multiple (green). If the field has per-context configurations with different modes, the column displays the Varies by context label (grey) to indicate that the mode depends on the issue's active context. Click Configure to review each context's mode individually.
- Related Projects: Indicates in which projects the field is used. If it is available for all projects, it will be displayed as "Global (All projects)".
- Actions: Provides quick actions for the field.
- Configure: This is the most important action. Clicking it will take you to the detailed configuration page for that specific field.